Visible Mending: 15 Embroidery Ideas to Cover Holes in Sweaters, Shirts and Tees (Free Printable Patterns)
You find it on a Sunday morning: a moth hole in your favourite sweater, a frayed cuff, a small tear right on the front of a shirt you love. Visible mending is the answer that does not involve the bin. Instead of hiding the damage, you stitch over it with something worth looking at.
Below are 15 visible mending embroidery ideas for sweaters, sweatshirts, shirts and tees. Each one is chosen for a specific kind of damage, from a single pinhole to a worn-through elbow, and each comes with a free numbered pattern and a transfer template you can print.
In This Post
- What You Will Need
- How to Prepare the Hole Before You Stitch
- The 10 Stitches Behind These Designs
- How to Use the Free Patterns
- 15 Visible Mending Embroidery Ideas
- Golden Sun Over a Moth Hole on a Sweater
- Dandelion Clock Over Scattered Moth Holes
- Scattered Stars Over Tiny Holes
- Rain Cloud Over a Worn Patch on Denim
- Red Heart Over a Small Tear
- Eyelet Flower Made From the Hole
- Colour-Block Darns on Frayed Cuffs
- Rainbow Woven Darn on an Elbow
- Blanket-Stitch Rainbow on a Frayed Neckline
- Little Mushroom Over a Hole
- Fern Vine Along a Split Seam
- Honeybee Over a Pinhole
- Crescent Moon Over a Hole
- Strawberry Over a Hole on a White Tee
- Daisy Cluster Over a Group of Holes
- How to Wash Mended Clothes
- FAQ
What You Will Need
- Embroidery floss: six-strand cotton floss. Each pattern key lists DMC colour numbers; any brand in a similar shade works.
- Embroidery needles: size 7 to 9 crewel needles for shirts and tees, a size 5 or a chenille needle for knits and denim.
- A blunt tapestry needle for woven darns on knits; it slips between the stitches instead of splitting the yarn.
- A small embroidery hoop: 4 to 5 in (10 to 13 cm). Skip the hoop on cuffs and necklines and use a darning mushroom or a small jar instead.
- Lightweight fusible interfacing for holes and tears in woven fabric, and soft iron-on or tear-away stabilizer for tees and sweatshirts.
- A water-soluble fabric pen for light fabrics and water-soluble printable stabilizer sheets for dark knits.
- Small embroidery scissors and a few pins to mark the holes.
- The garment: clean and dry, so you can see every hole.
How to Prepare the Hole Before You Stitch
Embroidery on its own does not hold a hole together. It needs something firm to sit on. Mending holes with embroidery is always two steps: stabilize the damage, then stitch the design over it.
- Woven fabric (shirts, denim, chambray): trim loose threads, then iron a patch of lightweight fusible interfacing on the inside, about 1/2 in (12 mm) bigger than the hole on every side. On denim you can use a scrap of cotton instead and catch it in with your stitches.
- Knits (sweaters, cardigans): never cut the loose loops. Catch them with a few stitches in matching yarn so the hole stops growing. Small holes can then be covered directly; bigger ones need a woven darn first.
- Jersey and fleece (tees, sweatshirts): put a soft stabilizer on the inside before you hoop the fabric, and do not stretch it in the hoop.
- Mark every hole with a pin before you trace the pattern. Then turn the template until the solid parts of the design land on the holes.
The 10 Stitches Behind These Designs
Every design here uses some combination of these stitches. Satin stitch and the woven darn do most of the covering work; the rest add detail.
Satin stitch
Close parallel stitches that fill a shape. It covers holes best.
Straight stitch
A single stitch from A to B. Rays, seeds, stars and grass.
Lazy daisy stitch
A small anchored loop. Petals, leaves and wings.
French knot
Thread wrapped around the needle. Flower centres and dots.
Back stitch
A solid line of joined stitches. Outlines.
Stem stitch
Overlapping slanted stitches. Stems and vines.
Blanket stitch
Loops along an edge. Binds frayed rib and holes.
Fly stitch
A V held by a tiny tie stitch. Fern fronds.
Seed stitch
Tiny scattered stitches. Fills and reinforces thin fabric.
Woven darn
Vertical threads, then weaving across them. Rebuilds a hole.
For step-by-step instructions for the other stitches, see the full beginner guide:
Hand Embroidery Stitches: 20 Basic Stitches for Beginners
How to Use the Free Patterns
Each idea has a numbered pattern. The numbers on the outline match the key below it, which tells you the part, the stitch and the thread colour. The dashed grey circles show where the hole should sit. Open View the transfer template to see the clean outline without numbers: print it at 100% and trace it onto the fabric, or print it straight onto a water-soluble stabilizer sheet and stick it in place.
Sizes are a guide. Measure the hole first and scale the template so the covering part of the design is at least 1/4 in (6 mm) bigger than the damage.
From Maker Warmth
Looking for your next stitch project?
Every pattern on this blog is free to print, from tiny bows to full denim jacket designs. Save this one, then browse the whole collection.
See all free patterns →15 Visible Mending Embroidery Ideas
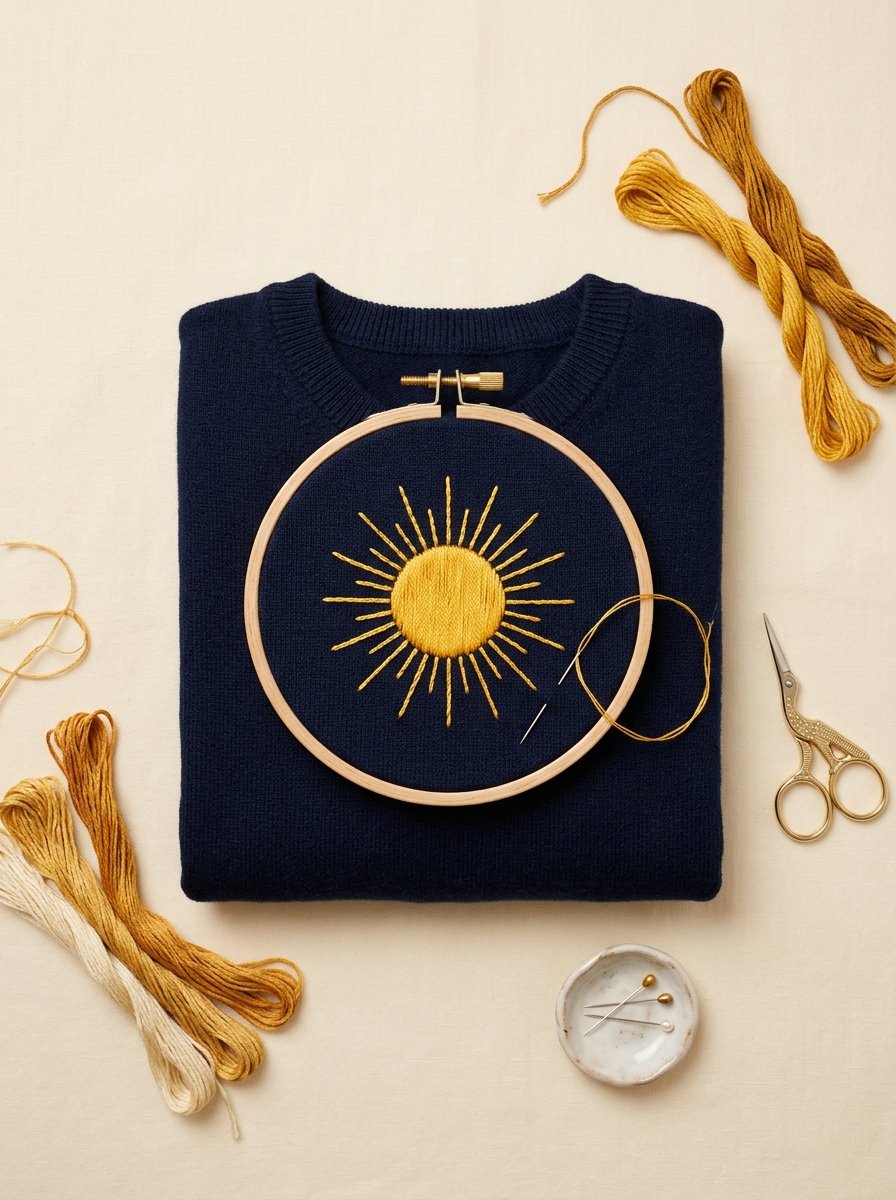
1. Golden Sun Over a Moth Hole on a Sweater
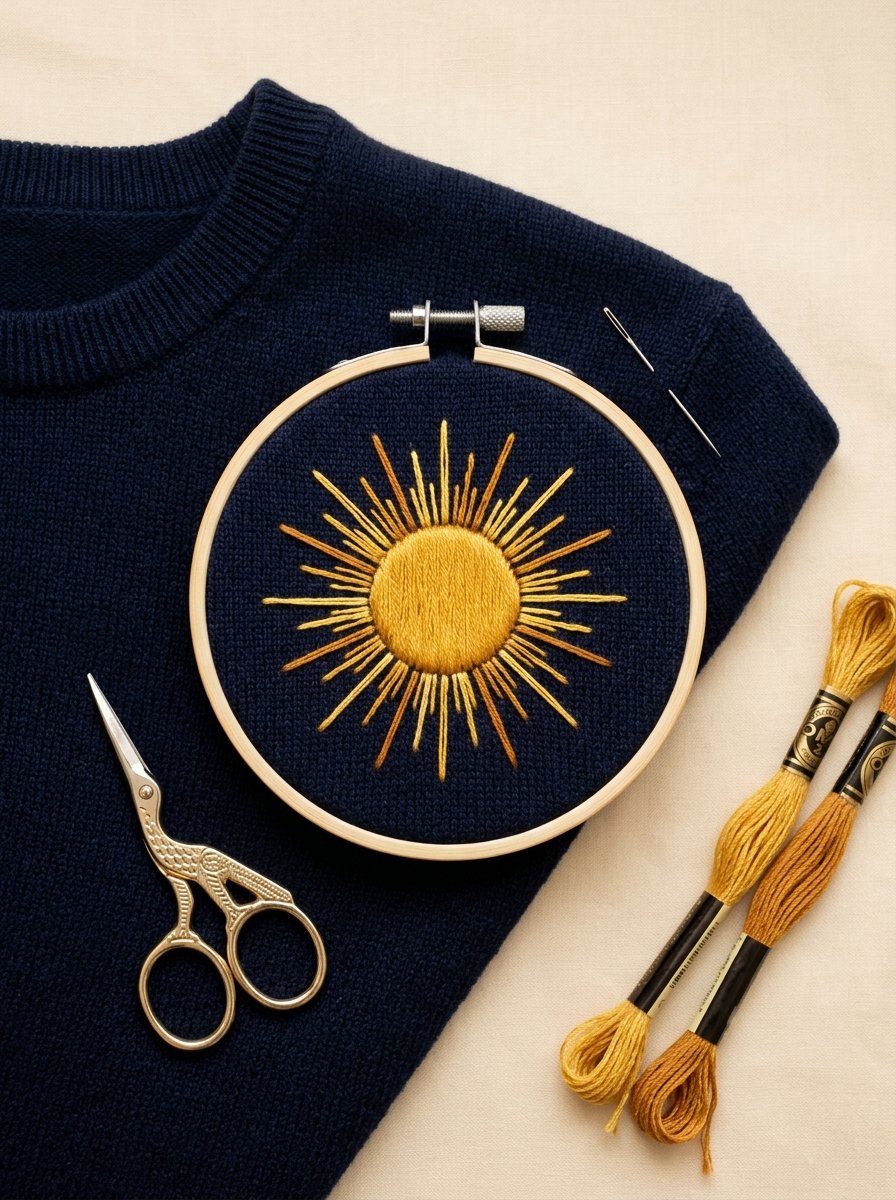
A sun is the most forgiving way to hide a round hole: the solid centre sits right on top of it, and the rays pull the eye outwards. On a navy or charcoal knit the gold glows, and nobody guesses there was ever a hole underneath.
Pattern key: Golden Sun Over a Moth Hole on a Sweater
| # | Part | Stitch | Thread | Strands |
|---|---|---|---|---|
| 1 | Sun centre | Satin stitch | DMC 725 Topaz | 3 |
| 2 | Long rays | Straight stitch | DMC 783 Medium Topaz | 3 |
| 3 | Short rays | Straight stitch | DMC 725 Topaz | 2 |
Finished size: about 3 in (7.5 cm) across.
View the transfer template
Print at 100% and trace, or print onto water-soluble stabilizer. Scale to: about 3 in (7.5 cm) across.
Tip: Darn the hole closed with matching yarn first, then stitch the satin centre over the repair. The rays can go straight onto the knit.
Here is how to close a hole in a sweater with matching yarn before you stitch the sun over it:
More designs for knitwear:
Sunflower Embroidery on Clothes: 8 Ideas for Denim, Shirts and Sweatshirts
2. Dandelion Clock Over Scattered Moth Holes
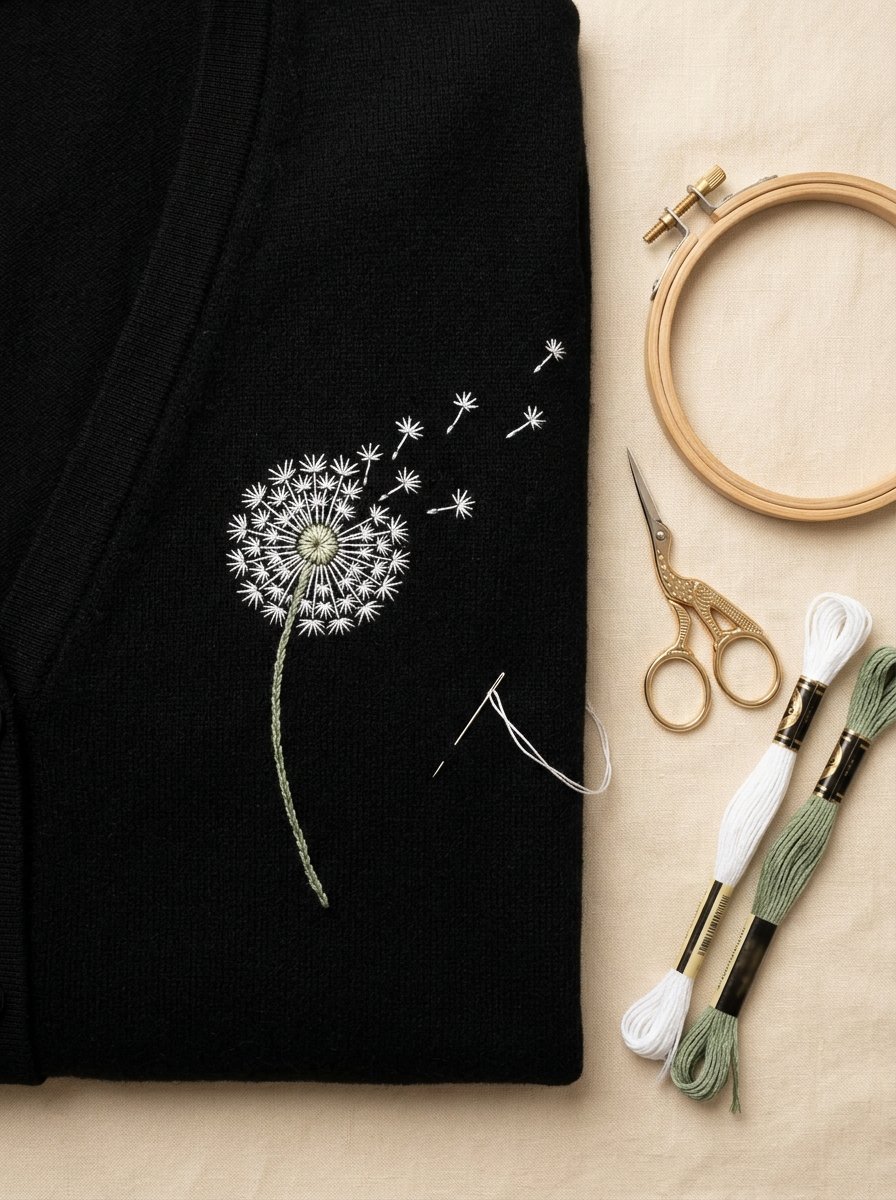
Moths rarely leave one neat hole. They leave a cluster, and that is exactly what a dandelion clock is made for. Place a seed tip over each little hole and let a few seeds drift away; the design absorbs the damage instead of fighting it.
Pattern key: Dandelion Clock Over Scattered Moth Holes
| # | Part | Stitch | Thread | Strands |
|---|---|---|---|---|
| 1 | Seed stems | Straight stitch | DMC B5200 Snow White | 2 |
| 2 | Seed tips | Straight stitch star | DMC B5200 Snow White | 2 |
| 3 | Drifting seeds | Straight stitch | DMC B5200 Snow White | 1 |
| 4 | Flower stem | Stem stitch | DMC 3052 Medium Green Gray | 2 |
Finished size: about 3 x 4 in (7.5 x 10 cm).
View the transfer template
Print at 100% and trace, or print onto water-soluble stabilizer. Scale to: about 3 x 4 in (7.5 x 10 cm).
Tip: Mark the holes with pins before you trace the pattern, then rotate the template until the seed tips land on them.
3. Scattered Stars Over Tiny Holes
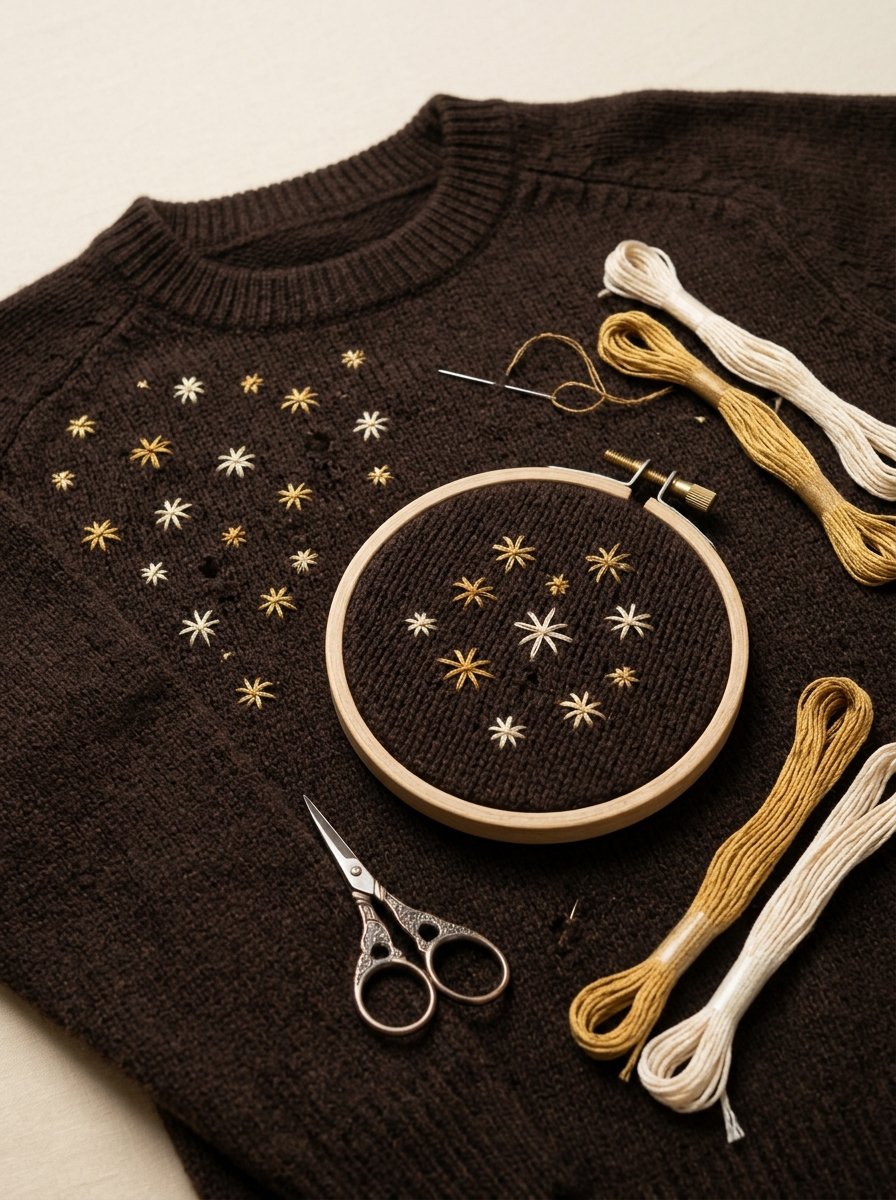
When the holes are tiny and spread across the front, one big motif would not reach them all. Scattered stars solve it: each star covers one hole, and a few extra stars on clean knit make the whole thing look planned.
Pattern key: Scattered Stars Over Tiny Holes
| # | Part | Stitch | Thread | Strands |
|---|---|---|---|---|
| 1 | Large stars | Straight stitch star (6 points) | DMC 676 Light Old Gold | 3 |
| 2 | Small stars | Straight stitch cross (4 points) | DMC 3865 Winter White | 2 |
Finished size: scatter over an area about 5 in (13 cm) wide.
View the transfer template
Print at 100% and trace, or print onto water-soluble stabilizer. Scale to: scatter over an area about 5 in (13 cm) wide.
Tip: Add two or three stars where there are no holes. If every star hides a repair, the pattern looks like a map of the damage.
4. Rain Cloud Over a Worn Patch on Denim
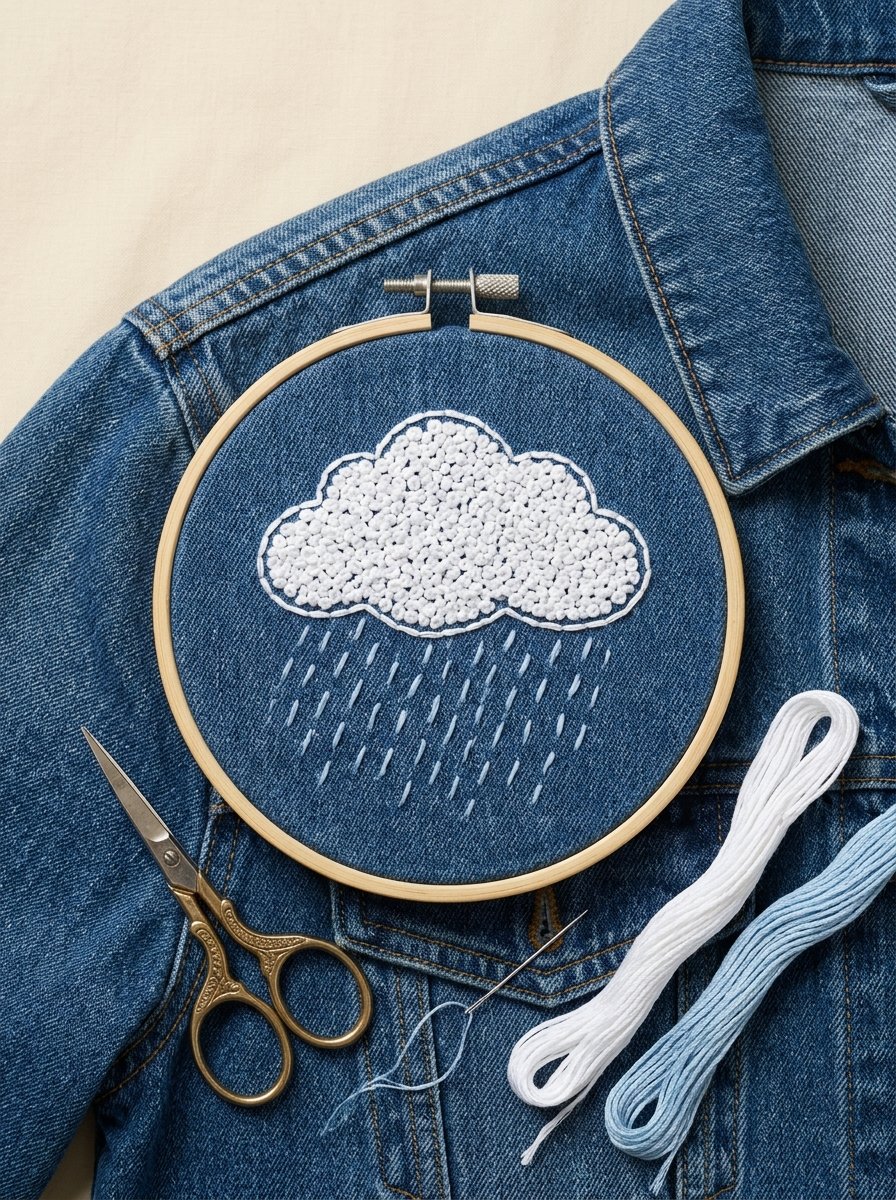
Denim does not tear in neat circles; it thins into soft, pale patches. A cloud fits that irregular shape, and the dense seed stitch reinforces the weak fabric at the same time as it decorates it.
Pattern key: Rain Cloud Over a Worn Patch on Denim
| # | Part | Stitch | Thread | Strands |
|---|---|---|---|---|
| 1 | Cloud outline | Back stitch | DMC B5200 Snow White | 2 |
| 2 | Cloud fill (over the worn patch) | Seed stitch | DMC B5200 Snow White | 2 |
| 3 | Rain | Straight stitch | DMC 3325 Light Baby Blue | 2 |
Finished size: about 4 x 4 in (10 x 10 cm).
View the transfer template
Print at 100% and trace, or print onto water-soluble stabilizer. Scale to: about 4 x 4 in (10 x 10 cm).
Tip: Back the worn area with a piece of lightweight cotton on the inside before you stitch, and catch it in with the seed stitches.
5. Red Heart Over a Small Tear
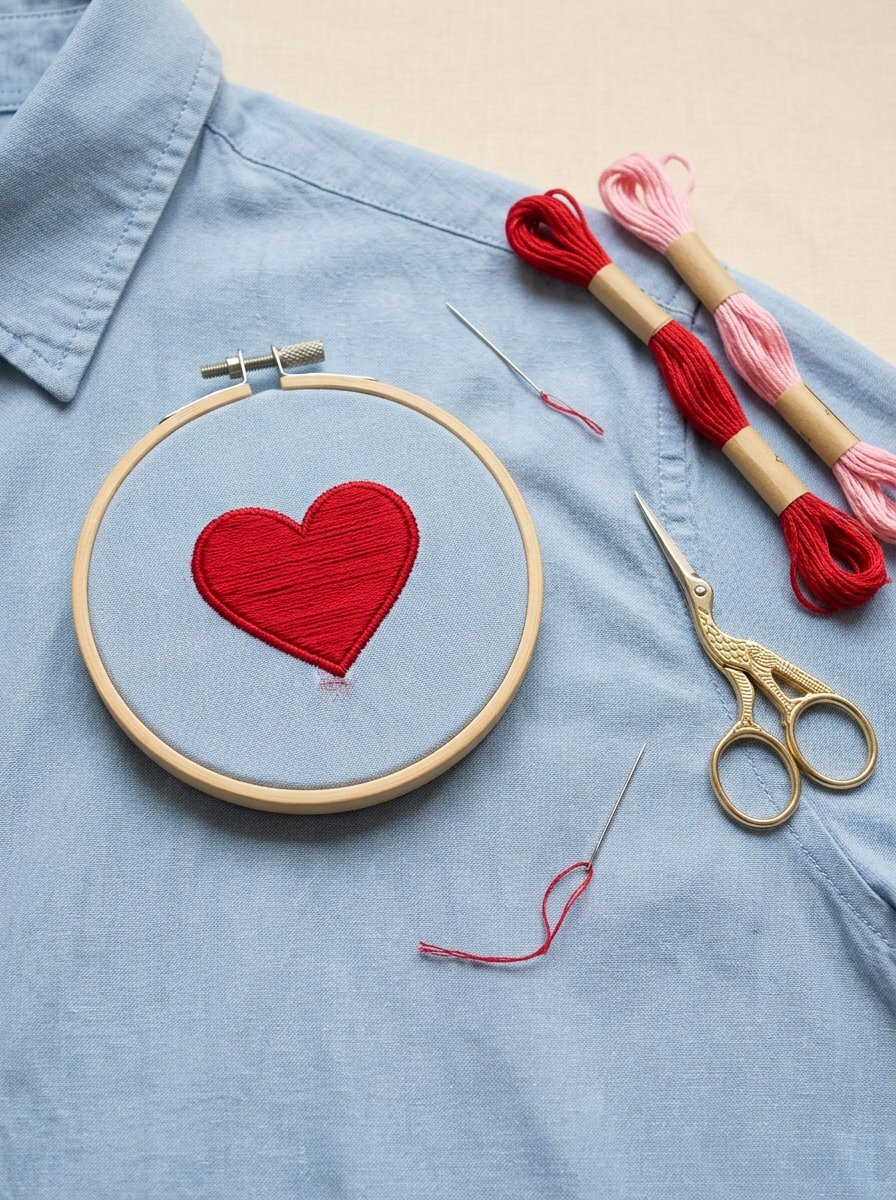
A small snag on a shirt front is the classic place for a heart. It is a simple shape, it reads from across the room, and the solid satin fill covers a tear up to about 1/2 in (12 mm) long.
Pattern key: Red Heart Over a Small Tear
| # | Part | Stitch | Thread | Strands |
|---|---|---|---|---|
| 1 | Heart outline | Split stitch | DMC 321 Red | 2 |
| 2 | Heart fill | Satin stitch, worked over the outline | DMC 321 Red | 3 |
Finished size: about 2.25 in (6 cm) wide.
View the transfer template
Print at 100% and trace, or print onto water-soluble stabilizer. Scale to: about 2.25 in (6 cm) wide.
Tip: Iron a small square of lightweight fusible interfacing behind the tear first. Satin stitch over a bare tear pulls it open again.
6. Eyelet Flower Made From the Hole
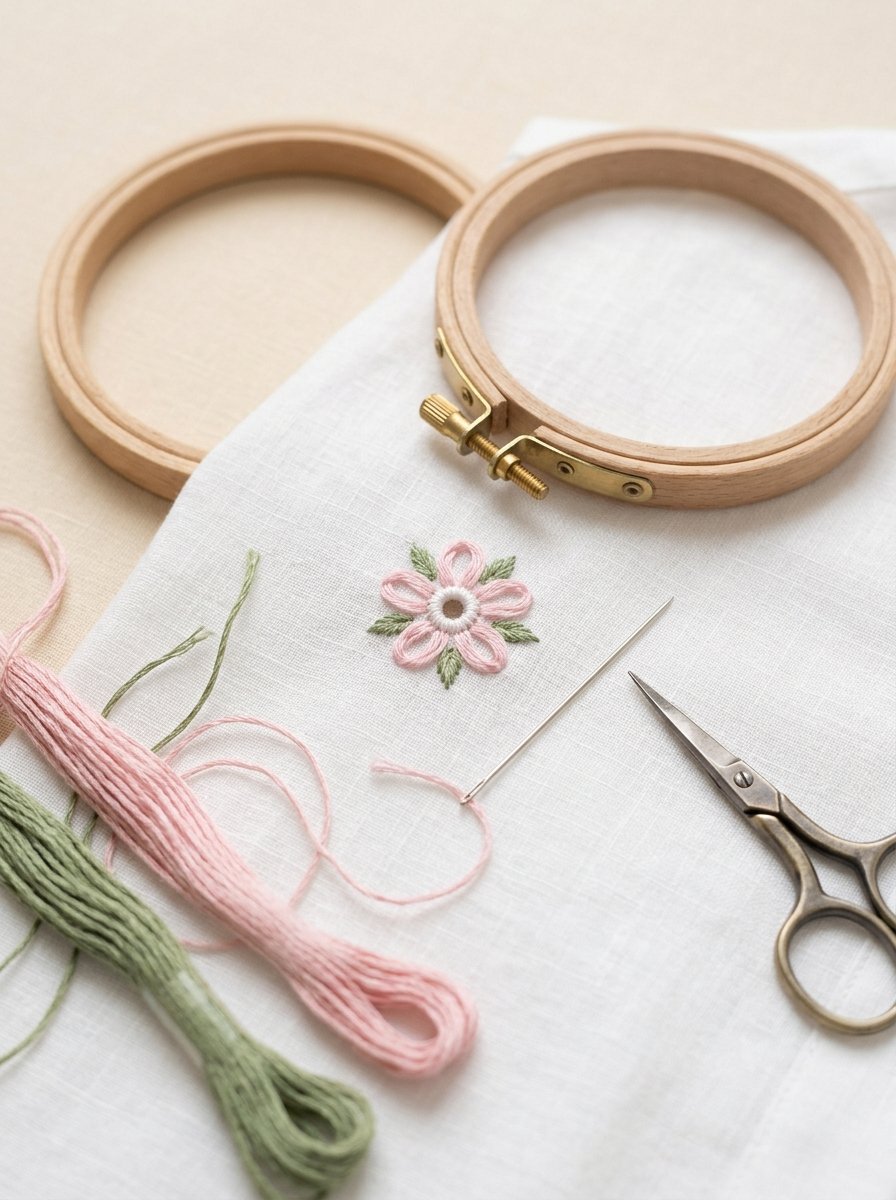
This one does not hide the hole at all. It finishes the edge with tight buttonhole stitch and turns it into the centre of a flower, the way broderie anglaise does on purpose. It works best on round holes up to about 1/4 in (6 mm).
Pattern key: Eyelet Flower Made From the Hole
| # | Part | Stitch | Thread | Strands |
|---|---|---|---|---|
| 1 | Eyelet (the hole) | Buttonhole stitch, worked tightly around the hole | DMC 3354 Light Dusty Rose | 2 |
| 2 | Petals | Lazy daisy stitch | DMC 3354 Light Dusty Rose | 2 |
| 3 | Leaves and stem | Lazy daisy and straight stitch | DMC 3347 Medium Yellow Green | 2 |
Finished size: about 2.5 in (6.5 cm) tall.
View the transfer template
Print at 100% and trace, or print onto water-soluble stabilizer. Scale to: about 2.5 in (6.5 cm) tall.
Tip: Trim any loose threads and keep the buttonhole stitches very close together, so the raw edge disappears completely.
7. Colour-Block Darns on Frayed Cuffs
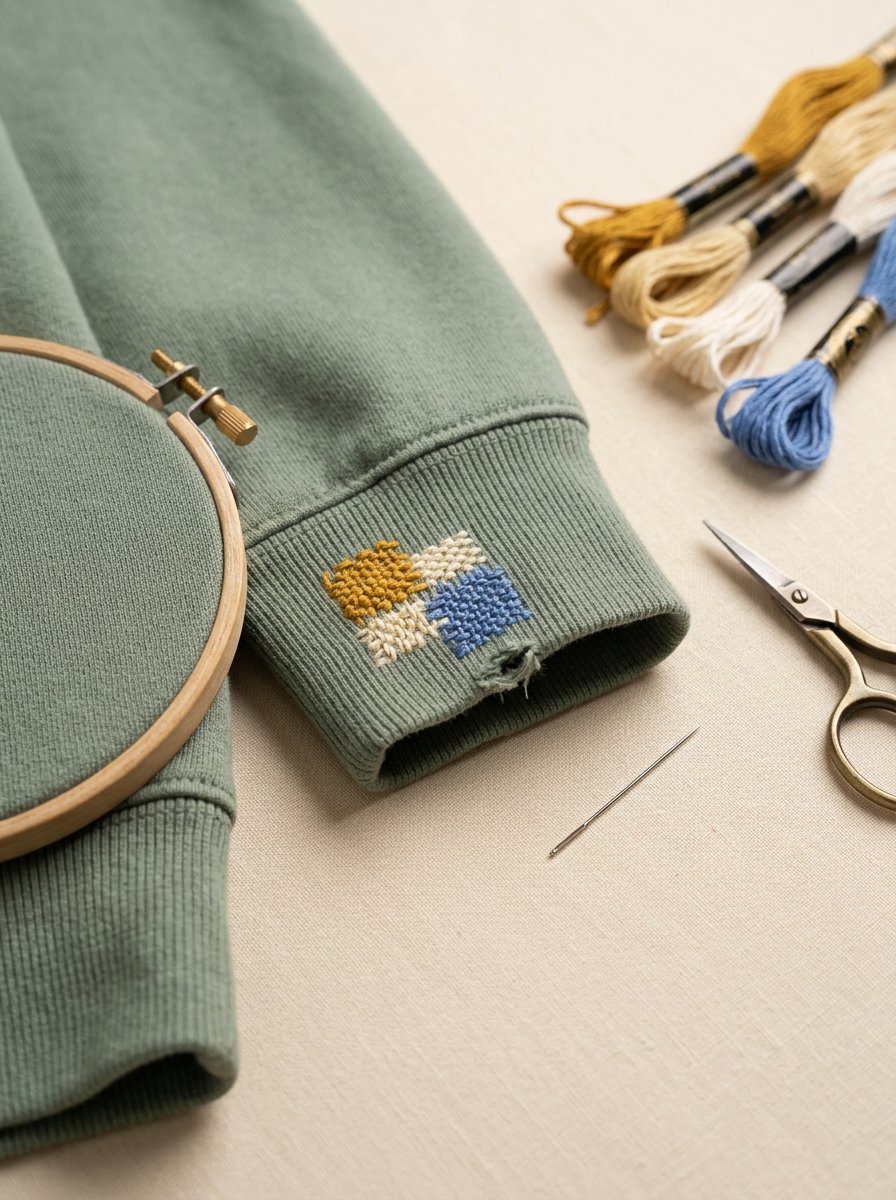
Cuffs wear through first, usually in a few small spots at once. Instead of matching the colour, weave each spot in a different shade. Three little blocks of colour look deliberate, like a detail the brand added.
Pattern key: Colour-Block Darns on Frayed Cuffs
| # | Part | Stitch | Thread | Strands |
|---|---|---|---|---|
| 1 | Darn 1 | Woven darn | DMC 729 Medium Old Gold | 6 |
| 2 | Darn 2 | Woven darn | DMC 3865 Winter White | 6 |
| 3 | Darn 3 | Woven darn | DMC 799 Medium Delft Blue | 6 |
Finished size: each darn about 1 in (2.5 cm) square.
View the transfer template
Print at 100% and trace, or print onto water-soluble stabilizer. Scale to: each darn about 1 in (2.5 cm) square.
Tip: Slip a small jar or a darning mushroom inside the cuff while you weave, so you never catch the other side.
8. Rainbow Woven Darn on an Elbow
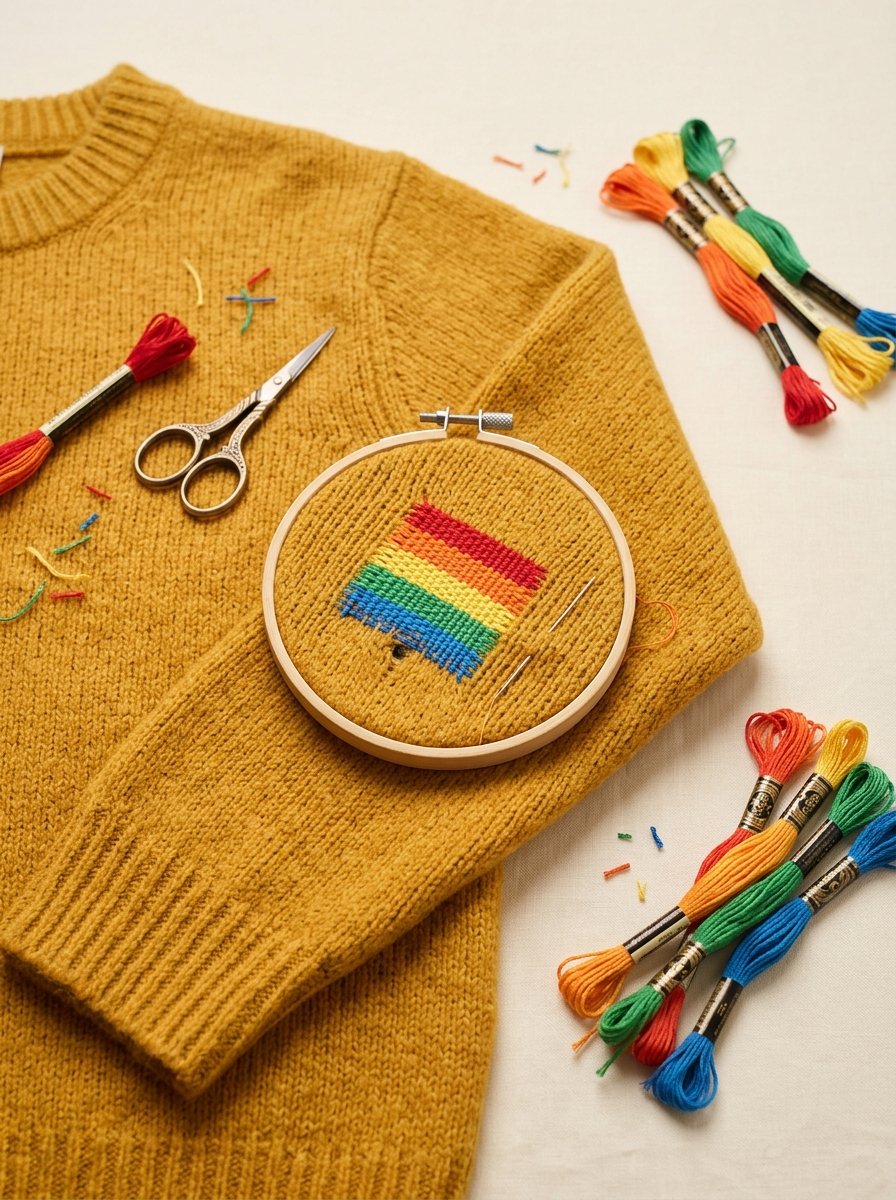
Elbow holes are often too big for embroidery alone. A woven darn rebuilds the fabric: you lay vertical threads across the hole, then weave across them in bands of colour. The rainbow turns the repair into the best part of the sweater.
Pattern key: Rainbow Woven Darn on an Elbow
| # | Part | Stitch | Thread | Strands |
|---|---|---|---|---|
| 1 | Warp (vertical threads) | Running stitch rows across the hole | DMC 3865 Winter White | 6 |
| 2 | Weft band 1 | Woven darn | DMC 666 Bright Red | 6 |
| 3 | Weft band 2 | Woven darn | DMC 740 Tangerine | 6 |
| 4 | Weft band 3 | Woven darn | DMC 444 Dark Lemon | 6 |
| 5 | Weft band 4 | Woven darn | DMC 702 Kelly Green | 6 |
| 6 | Weft band 5 | Woven darn | DMC 797 Royal Blue | 6 |
Finished size: about 2 x 2.5 in (5 x 6.5 cm); size it 1/4 in (6 mm) past the hole on every side.
View the transfer template
Print at 100% and trace, or print onto water-soluble stabilizer. Scale to: about 2 x 2.5 in (5 x 6.5 cm); size it 1/4 in (6 mm) past the hole on every side.
Tip: Start the warp threads 1/4 in (6 mm) outside the hole on every side, so the darn is anchored in strong knit, not in the frayed edge.
9. Blanket-Stitch Rainbow on a Frayed Neckline
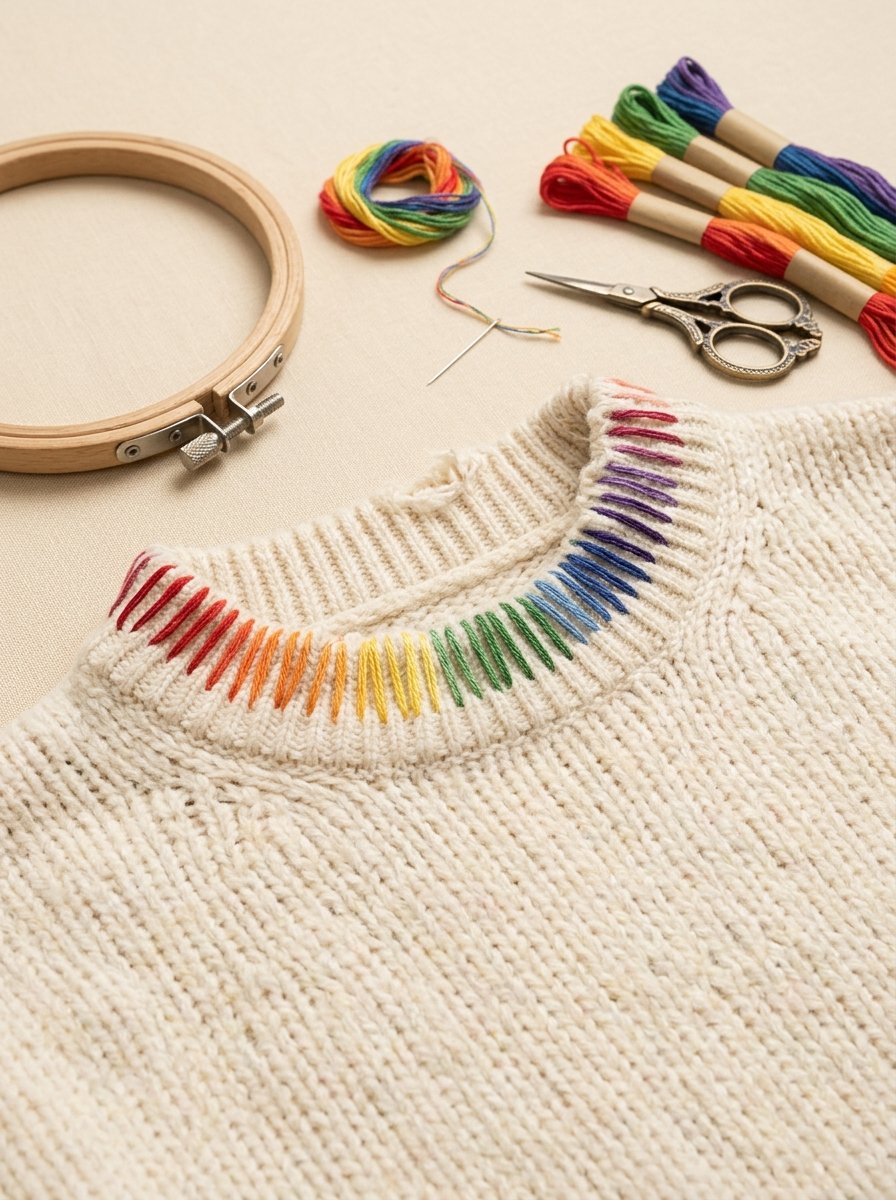
When the rib of a neckline starts to fray, blanket stitch binds the edge and stops it unravelling. Change colour every few inches and the repair becomes a rainbow trim.
Pattern key: Blanket-Stitch Rainbow on a Frayed Neckline
| # | Part | Stitch | Thread | Strands |
|---|---|---|---|---|
| 1 | Segment 1 | Blanket stitch along the rib edge | DMC 666 Bright Red | 3 |
| 2 | Segment 2 | Blanket stitch | DMC 740 Tangerine | 3 |
| 3 | Segment 3 | Blanket stitch | DMC 444 Dark Lemon | 3 |
| 4 | Segment 4 | Blanket stitch | DMC 702 Kelly Green | 3 |
| 5 | Segment 5 | Blanket stitch | DMC 797 Royal Blue | 3 |
Finished size: follows the neckline; each colour covers about 1.5 in (4 cm).
View the transfer template
Print at 100% and trace, or print onto water-soluble stabilizer. Scale to: follows the neckline; each colour covers about 1.5 in (4 cm).
Tip: Work with the sweater right side out and the needle entering from the outside, so the loops sit on the very edge of the rib.
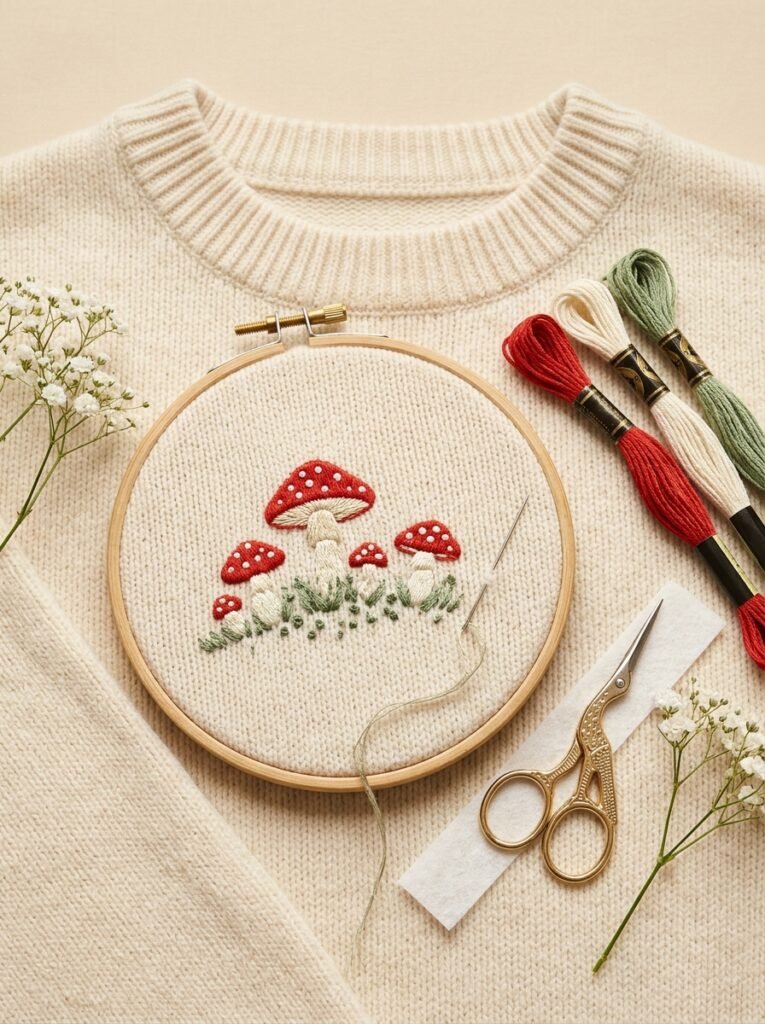
10. Little Mushroom Over a Hole
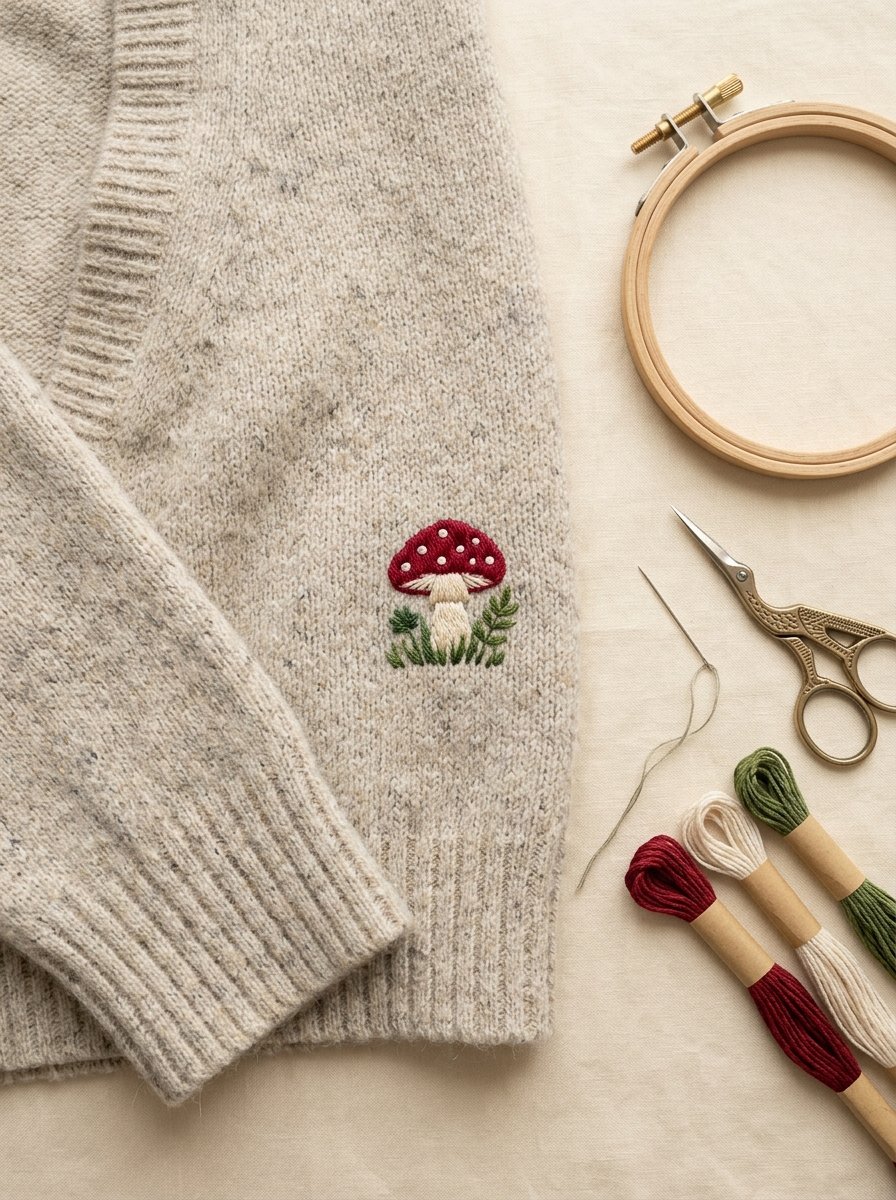
A toadstool is round on top and narrow at the base, so the cap covers a hole while the stem and grass stay light. It suits pockets, hems and the lower front of a cardigan.
Pattern key: Little Mushroom Over a Hole
| # | Part | Stitch | Thread | Strands |
|---|---|---|---|---|
| 1 | Cap | Satin stitch, worked around the dots | DMC 321 Red | 3 |
| 2 | Dots | Satin stitch or French knots | DMC B5200 Snow White | 2 |
| 3 | Stem | Satin stitch | DMC 712 Cream | 3 |
| 4 | Grass | Straight stitch | DMC 3347 Medium Yellow Green | 2 |
Finished size: about 2 in (5 cm) tall.
View the transfer template
Print at 100% and trace, or print onto water-soluble stabilizer. Scale to: about 2 in (5 cm) tall.
Tip: Stitch the white dots first and work the red satin stitch around them, so the dots stay crisp.
11. Fern Vine Along a Split Seam
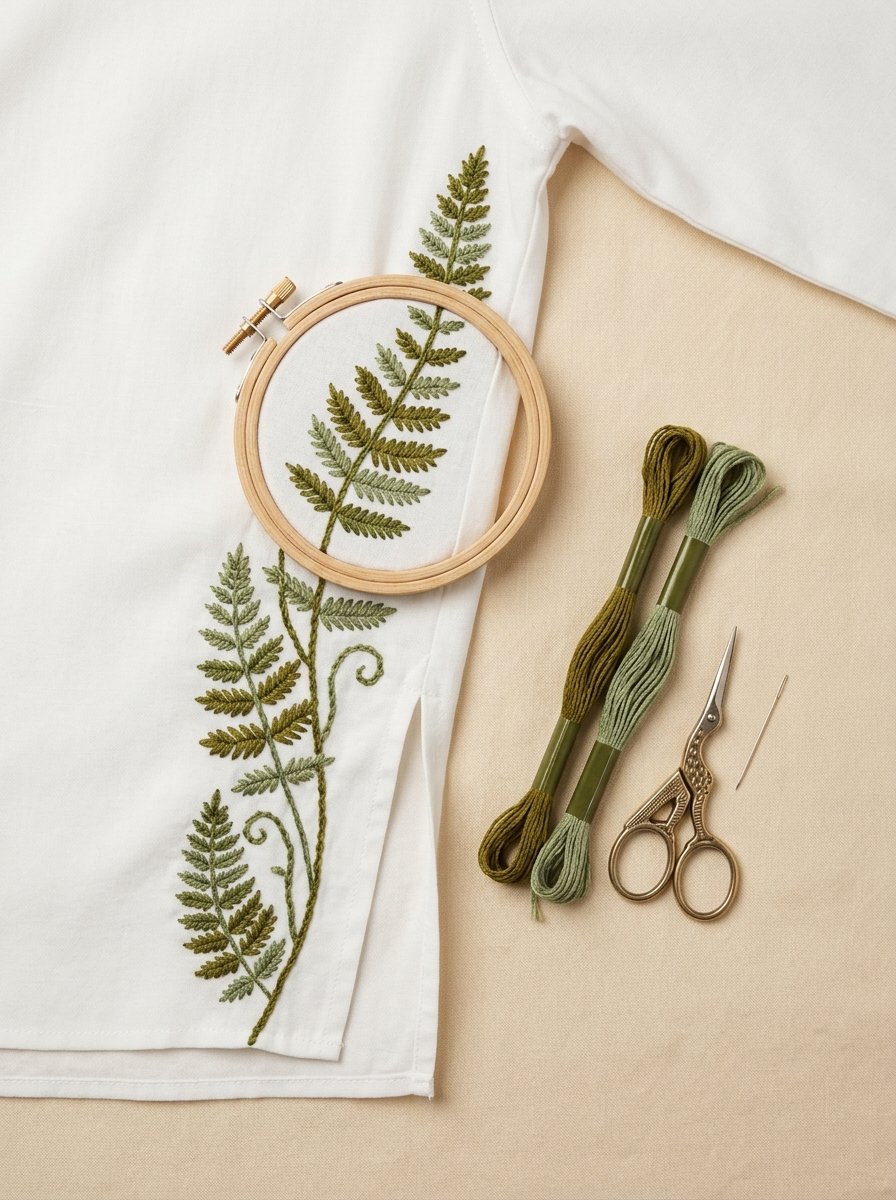
A long split seam or a straight tear is hard to hide with one motif. A vine follows the line instead. The stem stitch runs along the repaired seam and the fly-stitch fronds spread out on both sides.
Pattern key: Fern Vine Along a Split Seam
| # | Part | Stitch | Thread | Strands |
|---|---|---|---|---|
| 1 | Vine stem (along the seam) | Stem stitch | DMC 3051 Dark Green Gray | 2 |
| 2 | Fronds | Fly stitch | DMC 3052 Medium Green Gray | 2 |
Finished size: any length; repeat the frond spacing along the seam.
View the transfer template
Print at 100% and trace, or print onto water-soluble stabilizer. Scale to: any length; repeat the frond spacing along the seam.
Tip: Close the seam on the inside with small backstitches before you embroider. The vine is the decoration, not the repair.
12. Honeybee Over a Pinhole
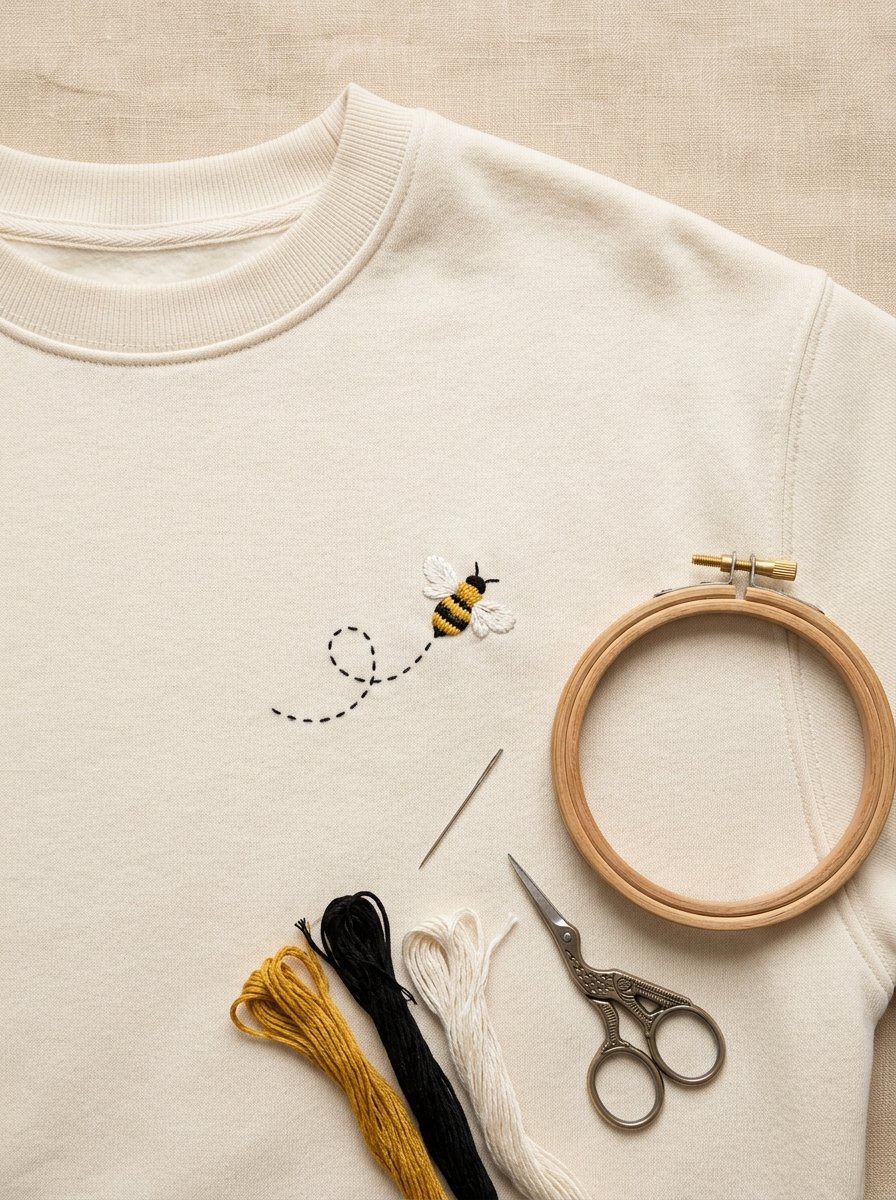
Pinholes and small burns are the easiest repairs in this list. A tiny bee covers one in under an hour, and the dotted flight path makes the design look bigger than it is.
Pattern key: Honeybee Over a Pinhole
| # | Part | Stitch | Thread | Strands |
|---|---|---|---|---|
| 1 | Body | Satin stitch | DMC 725 Topaz | 3 |
| 2 | Stripes | Satin stitch | DMC 310 Black | 2 |
| 3 | Wings | Lazy daisy stitch | DMC B5200 Snow White | 2 |
| 4 | Flight path | Running stitch | DMC 310 Black | 1 |
Finished size: about 1.25 in (3 cm) for the bee, plus the flight path.
View the transfer template
Print at 100% and trace, or print onto water-soluble stabilizer. Scale to: about 1.25 in (3 cm) for the bee, plus the flight path.
Tip: Sweatshirt fleece stretches, so put a soft tear-away or iron-on stabilizer on the inside before you hoop it.
13. Crescent Moon Over a Hole
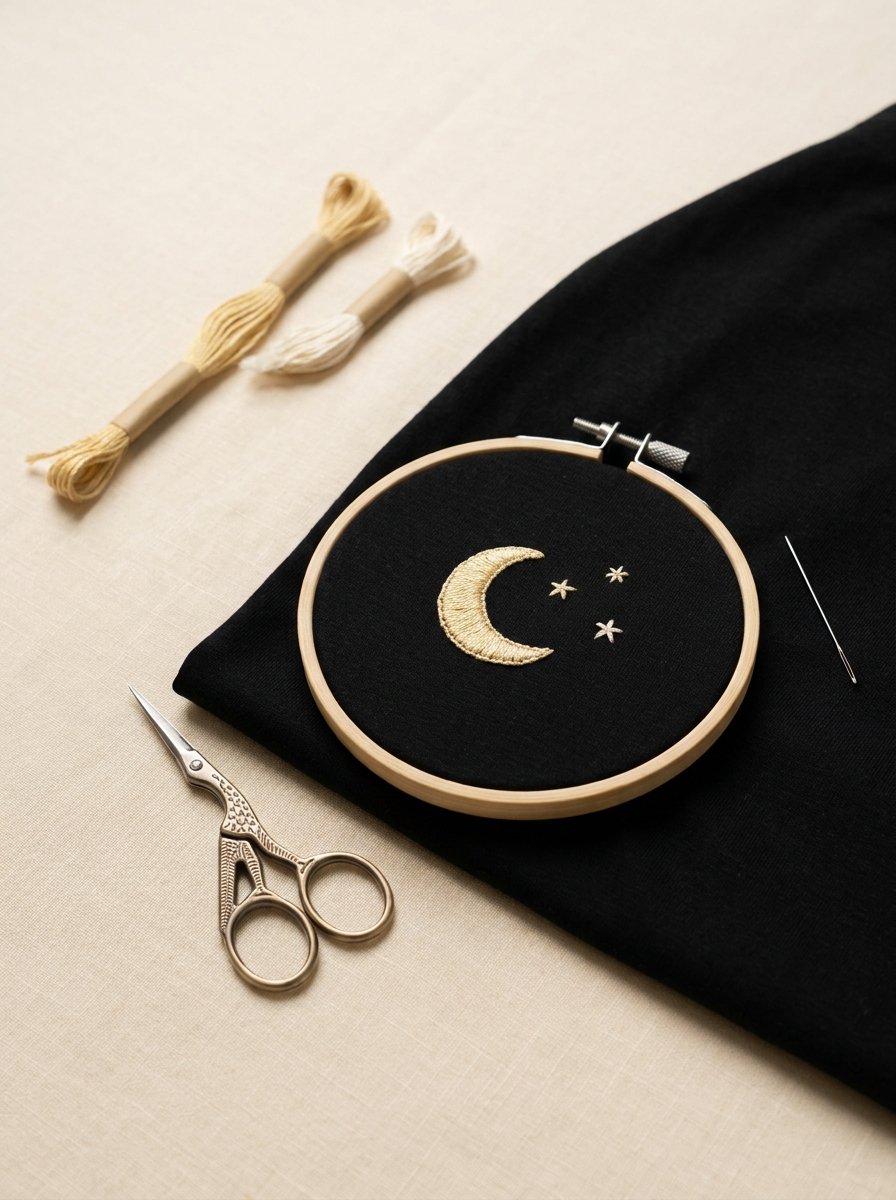
Black tees fade and pill, but a hole is what usually sends them to the bin. A pale gold crescent with three small stars covers the hole and gives the tee a quiet, grown-up detail.
Pattern key: Crescent Moon Over a Hole
| # | Part | Stitch | Thread | Strands |
|---|---|---|---|---|
| 1 | Crescent | Satin stitch | DMC 676 Light Old Gold | 3 |
| 2 | Stars | Straight stitch cross | DMC 3865 Winter White | 2 |
Finished size: about 2.25 in (6 cm) tall.
View the transfer template
Print at 100% and trace, or print onto water-soluble stabilizer. Scale to: about 2.25 in (6 cm) tall.
Tip: T-shirt jersey needs stabilizer on the back, and a ballpoint or fine embroidery needle that slips between the knit loops instead of cutting them.
14. Strawberry Over a Hole on a White Tee
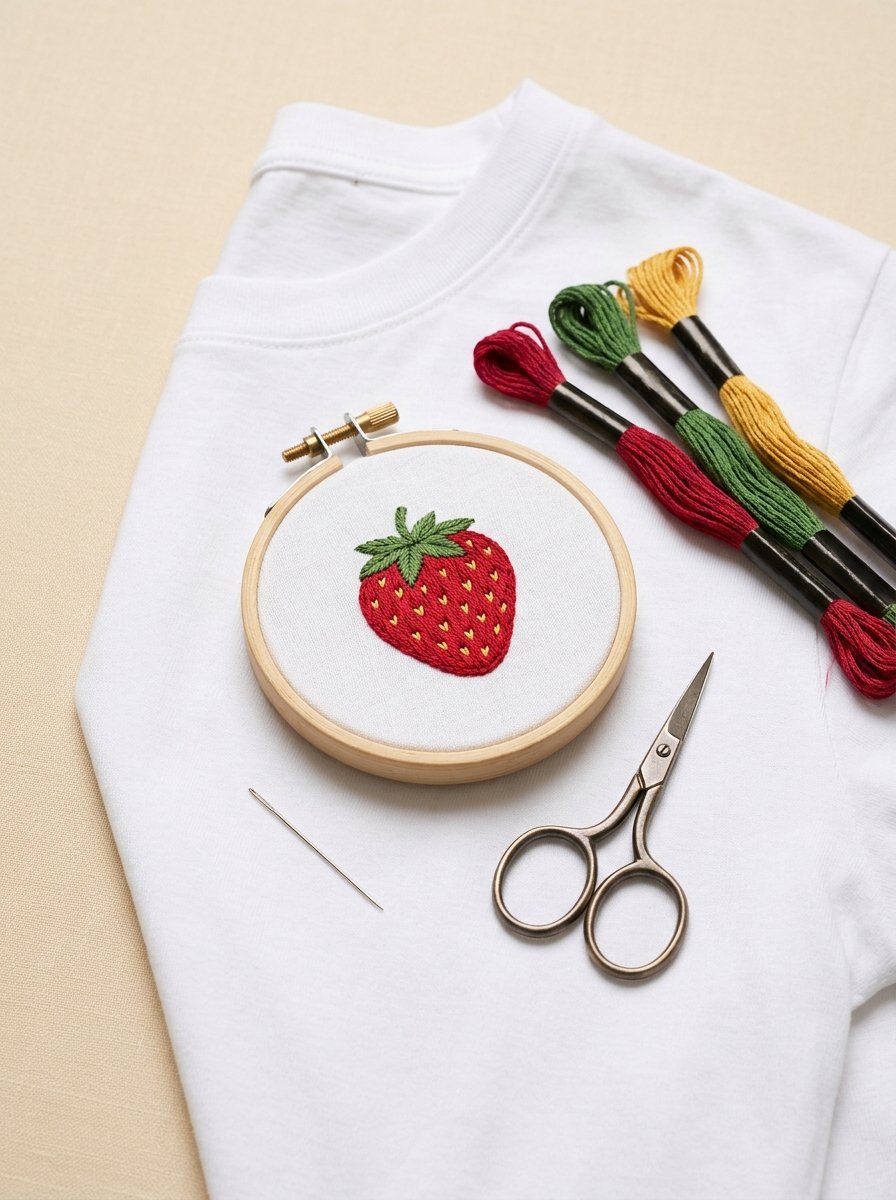
A strawberry is round enough to cover a hole and bright enough to be the reason you wear the tee. It also hides small stains, which white tees collect faster than holes.
Pattern key: Strawberry Over a Hole on a White Tee
| # | Part | Stitch | Thread | Strands |
|---|---|---|---|---|
| 1 | Berry | Satin stitch | DMC 666 Bright Red | 3 |
| 2 | Seeds | Straight stitch | DMC 444 Dark Lemon | 1 |
| 3 | Leaf cap | Lazy daisy stitch | DMC 702 Kelly Green | 2 |
| 4 | Stem | Straight stitch | DMC 702 Kelly Green | 2 |
Finished size: about 2 in (5 cm) tall.
View the transfer template
Print at 100% and trace, or print onto water-soluble stabilizer. Scale to: about 2 in (5 cm) tall.
Tip: Work the seeds last, on top of the red satin stitch, with a single strand so they stay tiny.
15. Daisy Cluster Over a Group of Holes
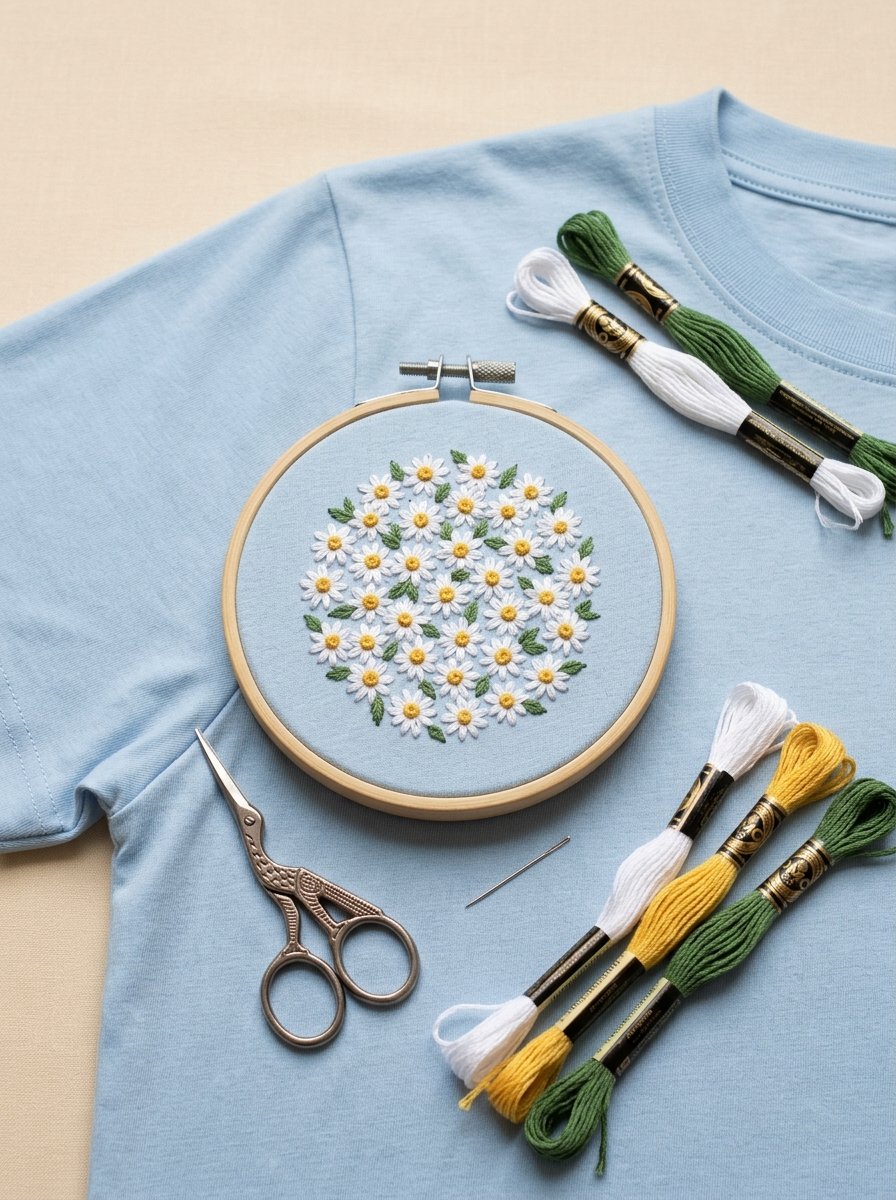
Several small holes close together look messy on their own. Put a daisy centre over each one and fill the gaps with a couple of extra flowers and leaves. The French knots hide the holes and the petals do the rest.
Pattern key: Daisy Cluster Over a Group of Holes
| # | Part | Stitch | Thread | Strands |
|---|---|---|---|---|
| 1 | Petals | Lazy daisy stitch | DMC B5200 Snow White | 2 |
| 2 | Centres (over each hole) | French knots, 3 to 5 per centre | DMC 725 Topaz | 3 |
| 3 | Leaves | Lazy daisy stitch | DMC 3347 Medium Yellow Green | 2 |
Finished size: cluster about 3.5 in (9 cm) across.
View the transfer template
Print at 100% and trace, or print onto water-soluble stabilizer. Scale to: cluster about 3.5 in (9 cm) across.
Tip: Make the French knots with 3 strands and wrap twice; bigger knots sit firmly over the hole and do not pull through.
How to Wash Mended Clothes
- Turn the garment inside out and wash cold on a gentle cycle, or hand wash knits.
- Rinse out the stabilizer. Water-soluble sheets dissolve in lukewarm water; tear-away stabilizer comes off gently from the back, a little at a time.
- Dry flat. Lay sweaters flat to dry and keep mended pieces out of the tumble dryer.
- Press from the back on a folded towel, embroidery side down, so the stitches stay raised.
FAQ
What is visible mending?
Visible mending is repairing clothes in a way that shows. Instead of matching the fabric and hiding the repair, you use contrasting thread, darning or embroidery so the mend becomes part of the design.
Can you cover a hole with embroidery?
Yes, as long as the hole is stabilized first. Back woven fabric with fusible interfacing, catch loose loops on knits, then stitch a solid motif, such as satin stitch or French knots, over the spot.
How big a hole can embroidery cover?
Satin-stitch motifs cover holes up to about 1/2 in (12 mm). Anything bigger, especially on knits, needs a woven darn first; you can then embroider on top of the darn or leave the darn as the design.
What is the easiest visible mending idea for beginners?
The honeybee, the crescent moon and the scattered stars. Each covers a small hole with only two or three stitches and takes about an hour.
Do I need a hoop for visible mending?
For flat areas like a shirt front or a sweater body, a small hoop helps. For cuffs, necklines and sleeves, use a darning mushroom, a darning egg or a small jar inside the garment instead.
Learn every stitch used in these patterns:
Hand Embroidery Stitches: 20 Basic Stitches for Beginners (Free Printable Cheat Sheet)