
Denim Embroidery Ideas: 12 Free Printable Patterns for Shirts, Skirts, Shorts and Dresses
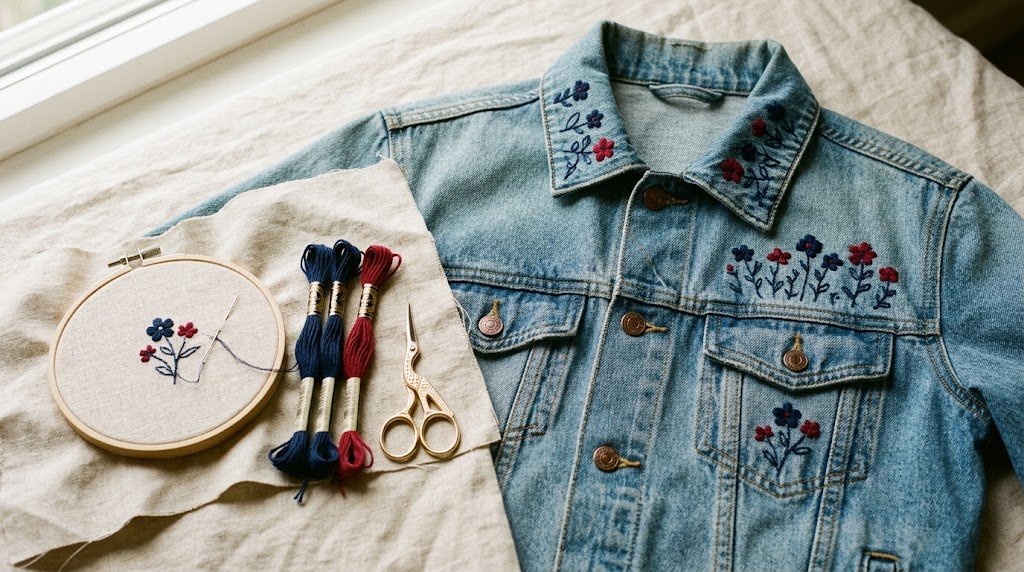
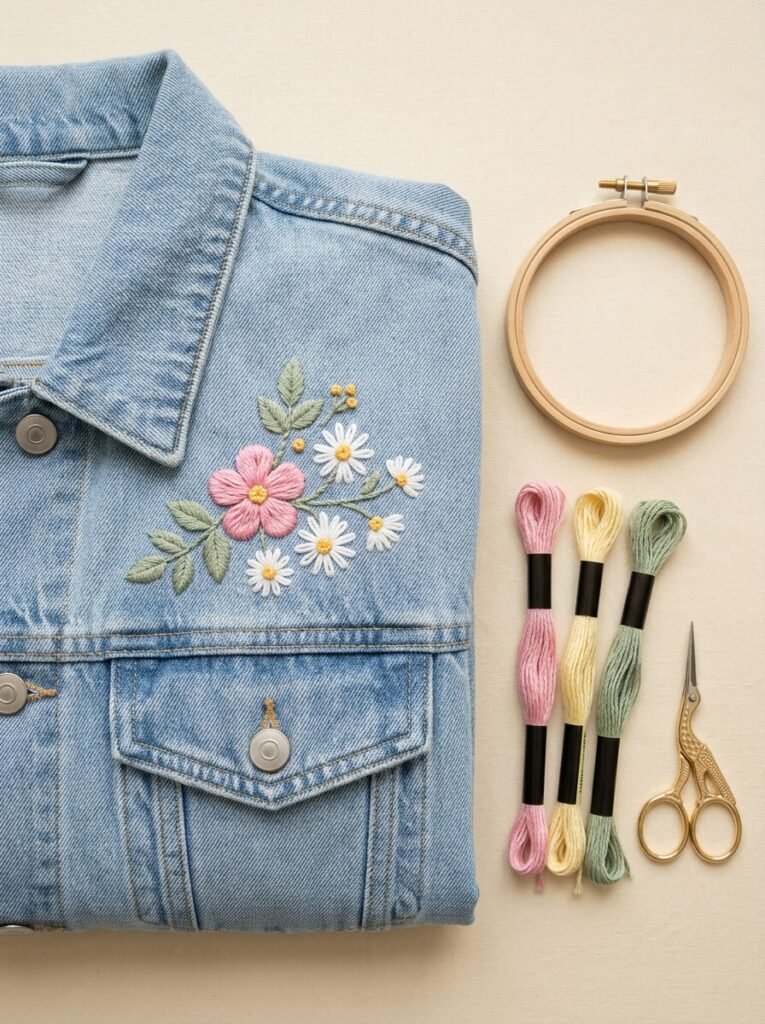
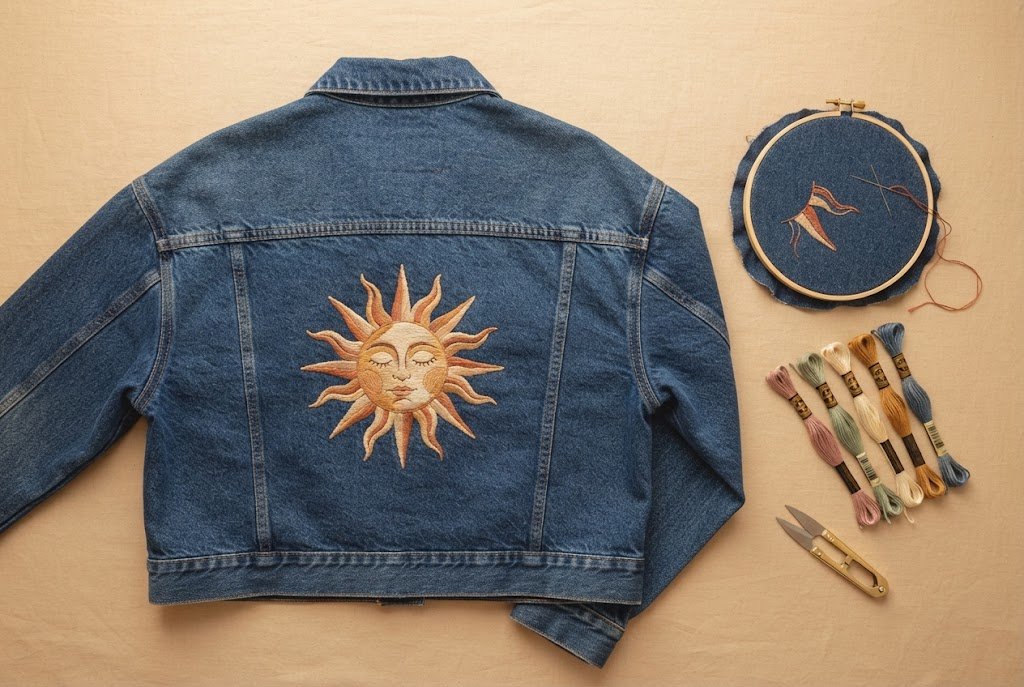
Denim embroidery doesn’t stop at jeans and jackets. A chambray shirt collar, the hem of an A-line skirt, the straps of old overalls: every one of these is a small, flat canvas that takes thread beautifully. This collection gathers 12 ideas for embroidery on denim pieces you probably already own.
Each idea notes where to place it, which stitches to use and which colors work, and comes with a free printable pattern. Most need only stem stitch, lazy daisy and French knots, so even a first project on denim is within reach.
In This Post
What You Will Need
- Six-strand cotton embroidery floss in the colors listed for each idea
- Embroidery needles, size 5 to 7: a sharp point goes through denim more easily
- A 6 in wooden embroidery hoop, plus a smaller one for collars and straps
- Water-soluble stick-and-stitch stabilizer for printing the patterns
- A white or light-colored water-soluble fabric pen, or white chalk for black denim
- Small sharp embroidery scissors
- A thimble, helpful on thick seams and pockets
- Sashiko thread and a sashiko needle for idea 8
Transferring the Patterns onto Denim
Denim is too thick and too dark for tracing over a window, so stick-and-stitch stabilizer is the easiest way to move a pattern onto it. Print the PDF at 100% (Actual Size) and check that the square on the page measures exactly 1 inch. Then trace or print the design onto the stabilizer, peel off the backing and press it onto the garment.
Stitch right through the stabilizer, then rinse it away in lukewarm water when you finish. Prewash the garment before you start, and keep pocket linings, back layers and the opposite side of a leg or strap out of the hoop so you only stitch through the front layer.
From Maker Warmth
Looking for your next stitch project?
Every pattern on this blog is free to print, from tiny bows to full denim jacket designs. Save this one, then browse the whole collection.
See all free patterns →Denim Shirt Embroidery
A denim shirt has more small flat areas than any other denim piece: collar points, a chest pocket and a wide back yoke. Chambray and lightweight shirt denim are also thinner than jeans, so the needle passes through easily.
1. Forget-Me-Nots on Shirt Collar Points
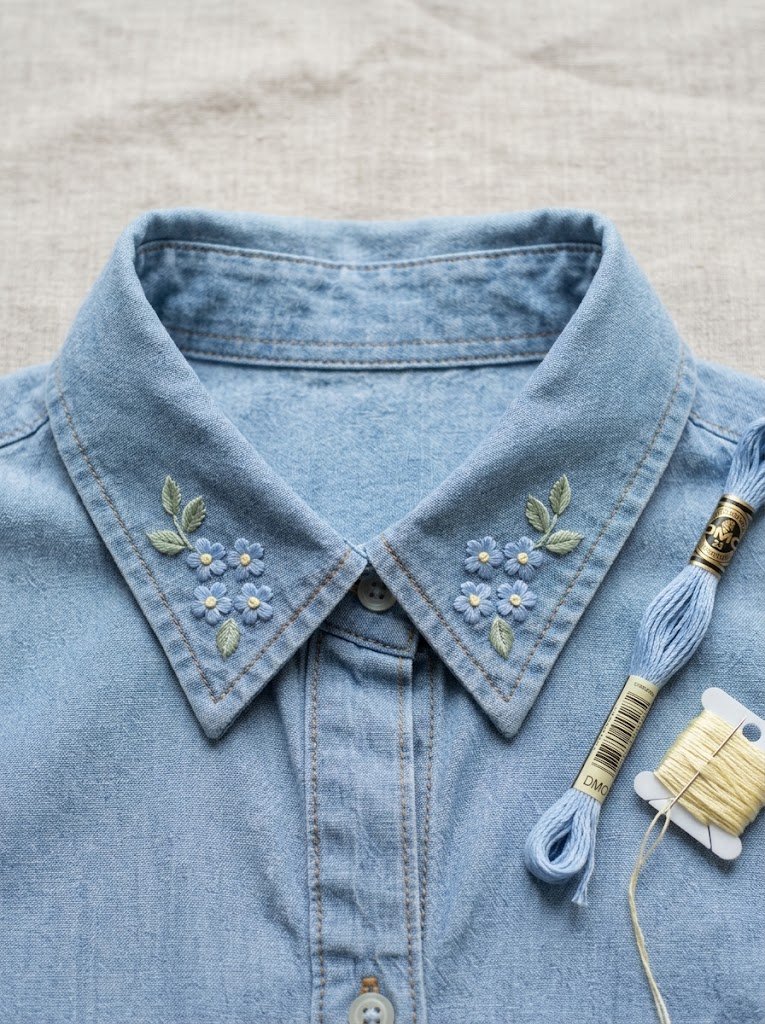
Three tiny forget-me-nots on each collar point are the quietest way to start on denim. They show only when you look closely, and the pale blue sits naturally on a light chambray shirt. Mirror the pattern for the second point so both clusters lean outward.
Placement: both collar points, about 6 mm in from the edges
Stitches: lazy daisy, French knot, stem stitch, satin stitch
Floss: soft blue, pale yellow, sage green
Level: Beginner
Time: about 1 hour for both points
Size: 1.1 x 1.0 in per point
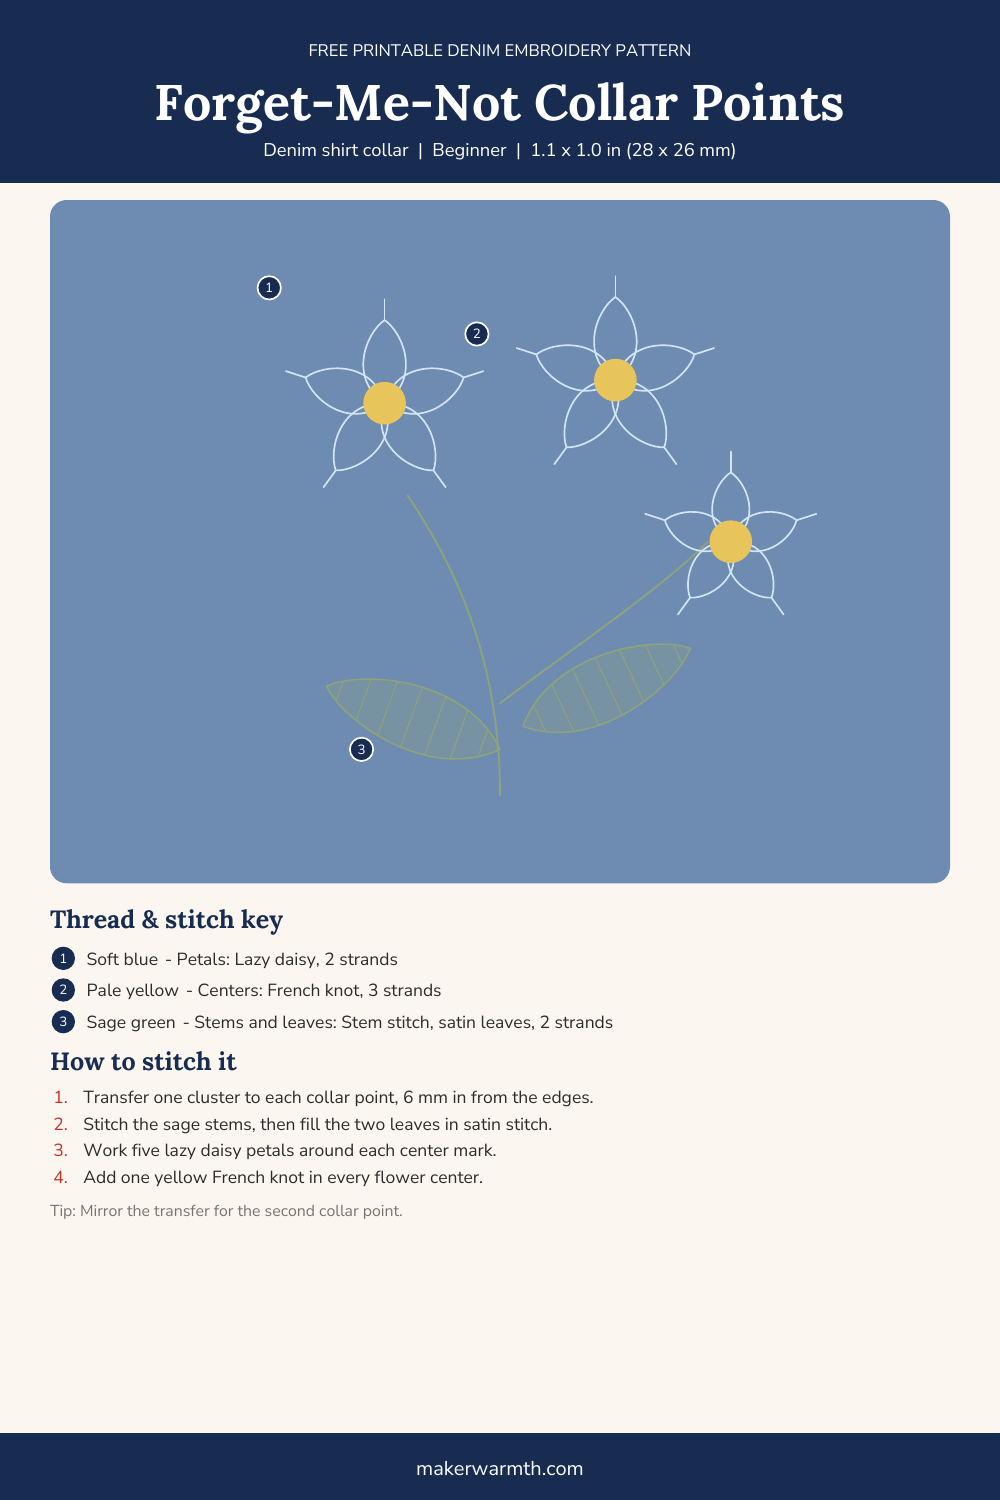
How to stitch it
- Transfer one cluster to each collar point.
- Stem stitch the sage stems, then fill the two leaves in satin stitch.
- Work five lazy daisy petals around each flower center.
- Add one pale yellow French knot in every center.
2. Lemon Branch on a Shirt Pocket
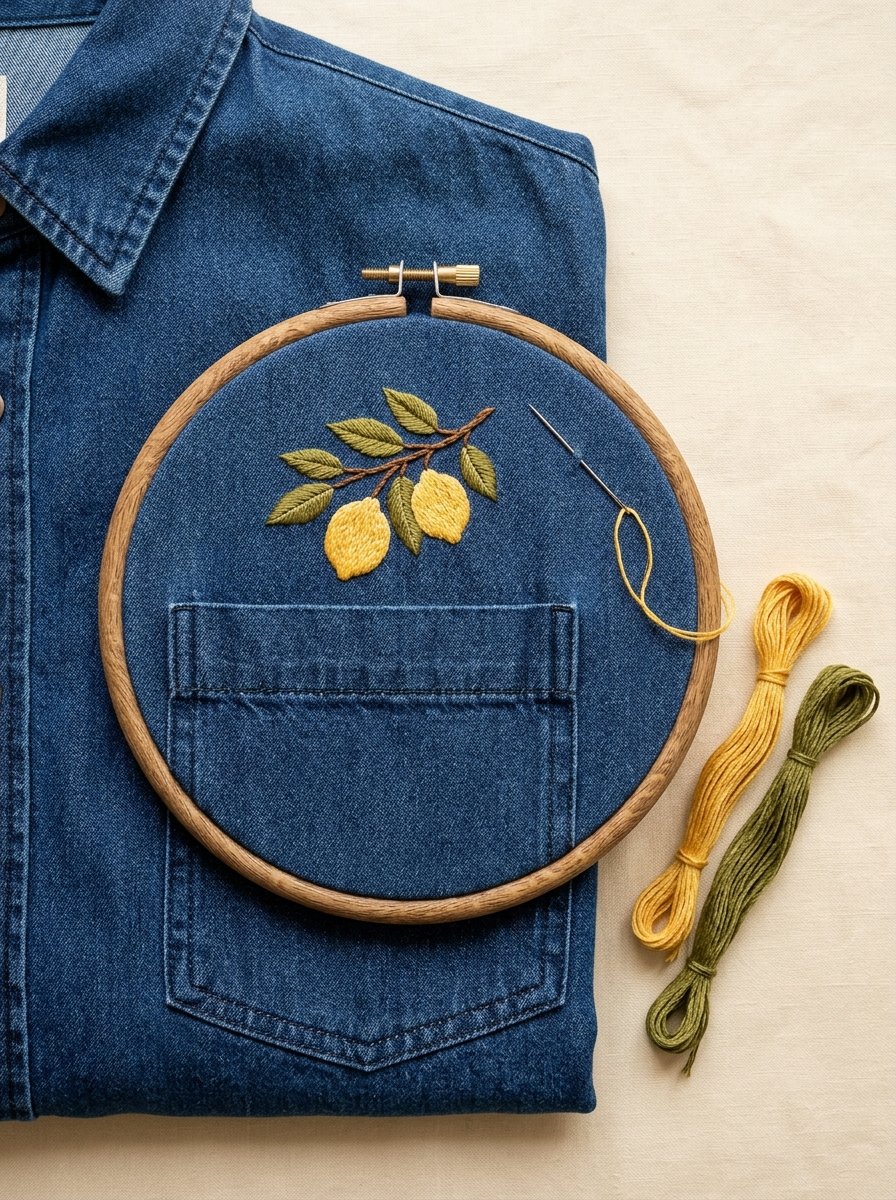
A small lemon branch above the chest pocket gives a denim shirt a fresh summer feel. The two lemons are filled in satin stitch, which looks smooth and slightly glossy on the twill. Keep the pocket open while you stitch so you go through one layer only.
Placement: just above the chest pocket opening
Stitches: stem stitch, satin stitch
Floss: warm brown, lemon yellow, olive green
Level: Confident beginner
Time: 2 to 3 hours
Size: 2.4 x 1.7 in
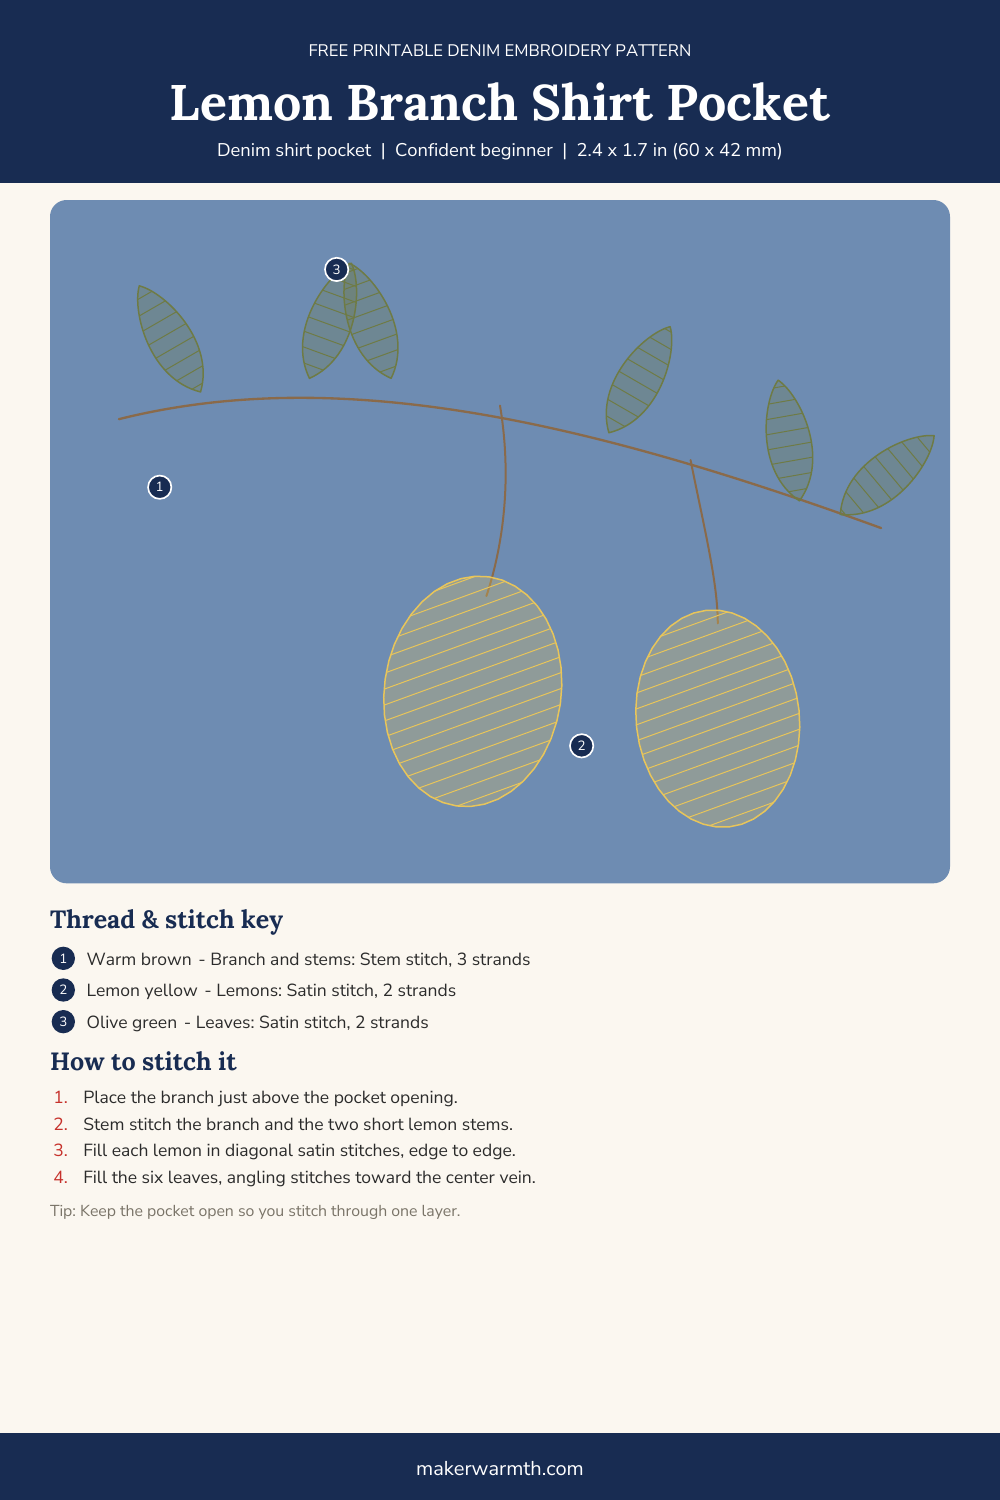
How to stitch it
- Stem stitch the branch and the two short lemon stems.
- Fill each lemon with diagonal satin stitches from edge to edge.
- Fill the six leaves, angling the stitches toward the center line.
3. Wildflower Arc Across the Back Yoke
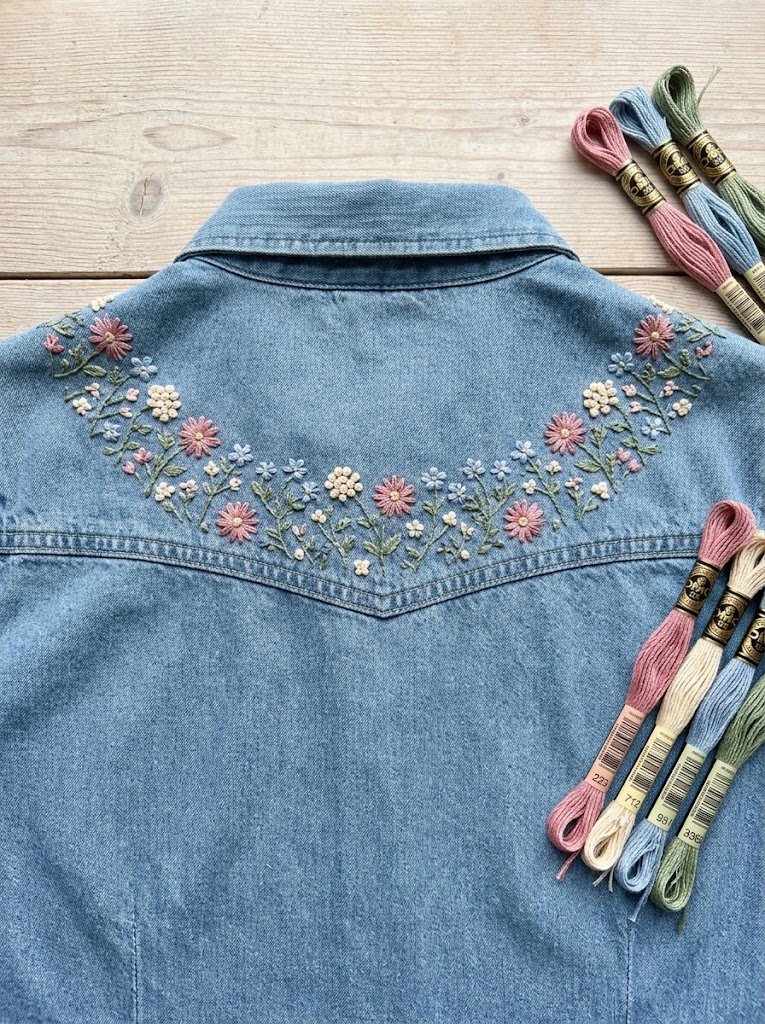
The back yoke is the biggest flat area on a shirt, and a gentle arc of wildflowers follows its shape. This is the longest project in the shirt group, so move the hoop along the arc in sections rather than trying to fit it all at once.
Placement: centered on the back yoke, 1 cm below the yoke seam
Stitches: stem stitch, lazy daisy, French knot, satin stitch
Floss: sage green, dusty pink, warm cream, soft blue, pale yellow
Level: Confident beginner
Time: 4 to 5 hours
Size: 5.5 x 1.8 in
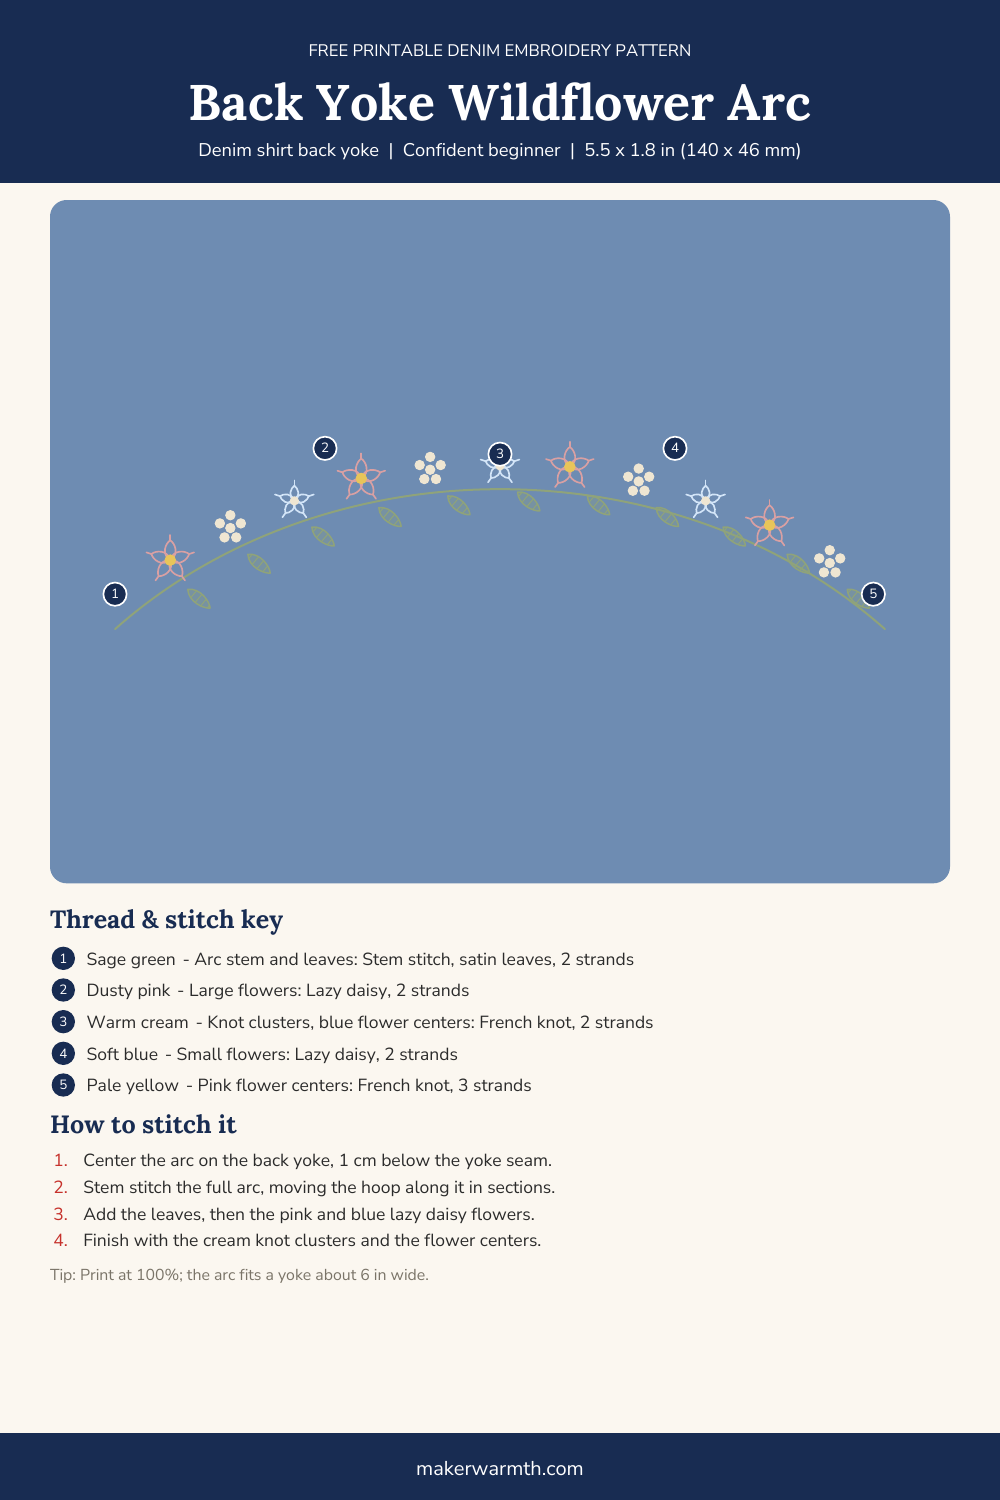
How to stitch it
- Stem stitch the full arc, moving the hoop along it.
- Add the small satin-stitch leaves under the arc.
- Stitch the pink and blue lazy daisy flowers.
- Finish with the cream knot clusters and the flower centers.
More ideas for a denim shirt’s bigger sibling:
Denim Jacket Embroidery Ideas: 12 Free Printable Patterns
Denim Skirt Embroidery
Skirts give you three easy places to stitch: the hem, the button placket and the pockets. A hem border is the most visible, and it repeats, so once you have stitched the first section the rest goes quickly.
4. Scalloped Hem Border with Daisies
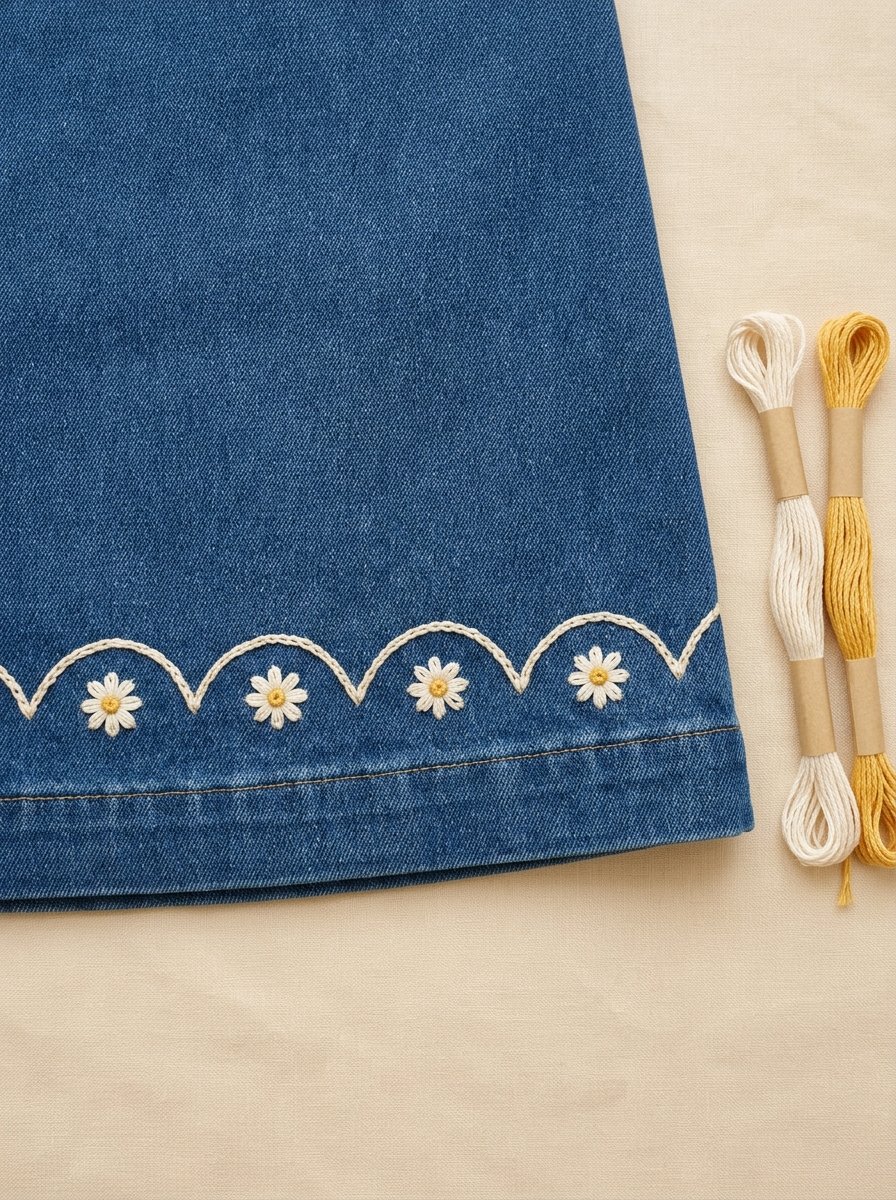
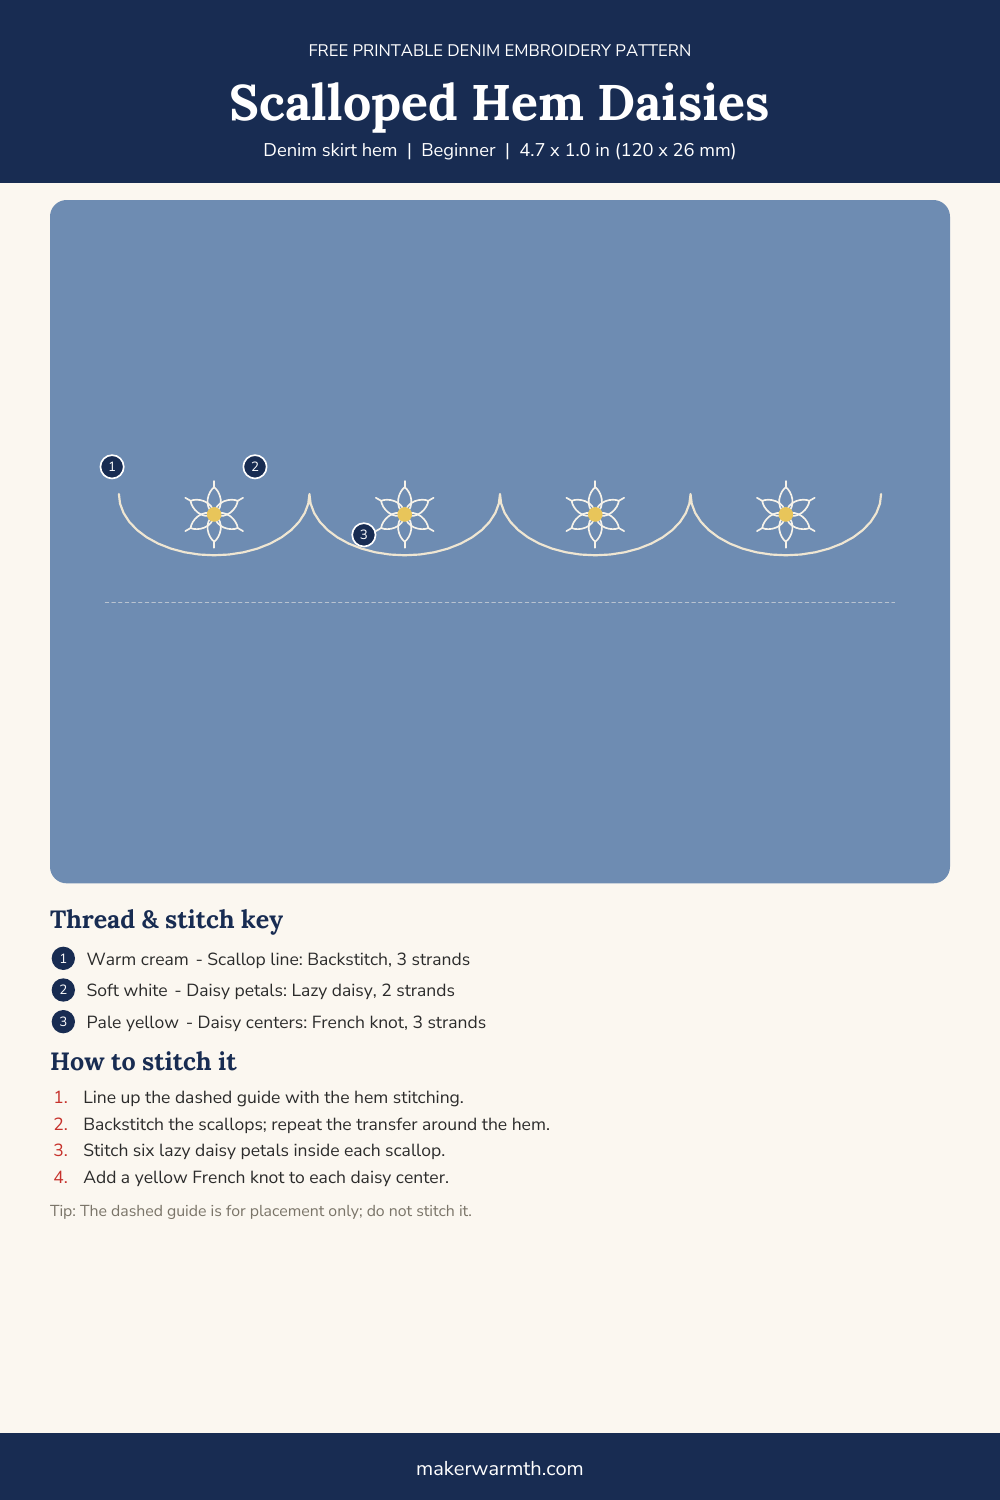
A cream scallop line with a little daisy in each curve turns a plain A-line skirt into something that looks made to order. The pattern holds four scallops; repeat it around the hem, lining up the dashed guide with the existing hem stitching each time.
Placement: just above the hem stitching, all the way around
Stitches: backstitch, lazy daisy, French knot
Floss: warm cream, soft white, pale yellow
Level: Beginner
Time: about 1 hour per repeat
Size: 4.7 x 1.0 in per repeat
How to stitch it
- Backstitch the scallop line; the dashed guide is for placement only.
- Stitch six lazy daisy petals inside each scallop.
- Add a pale yellow French knot to every daisy center.
5. Button Placket Vine
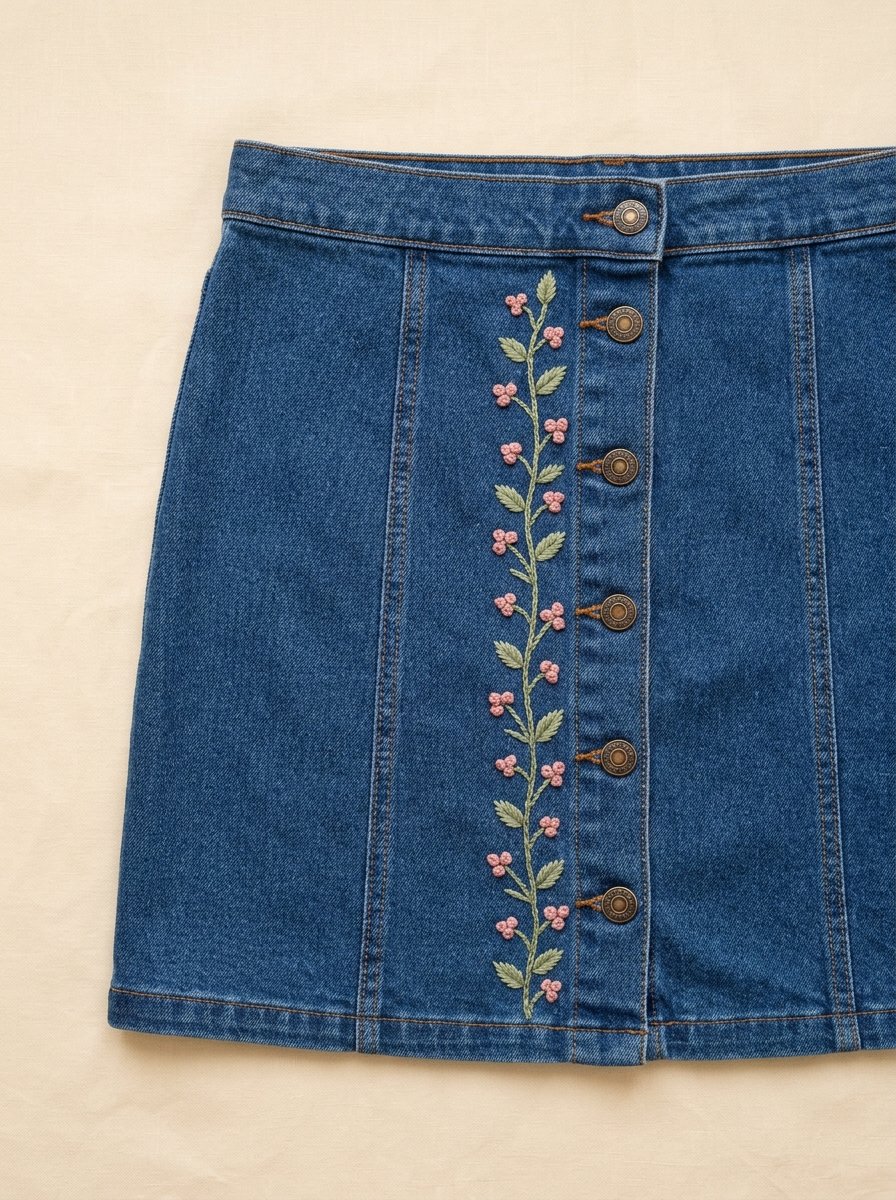
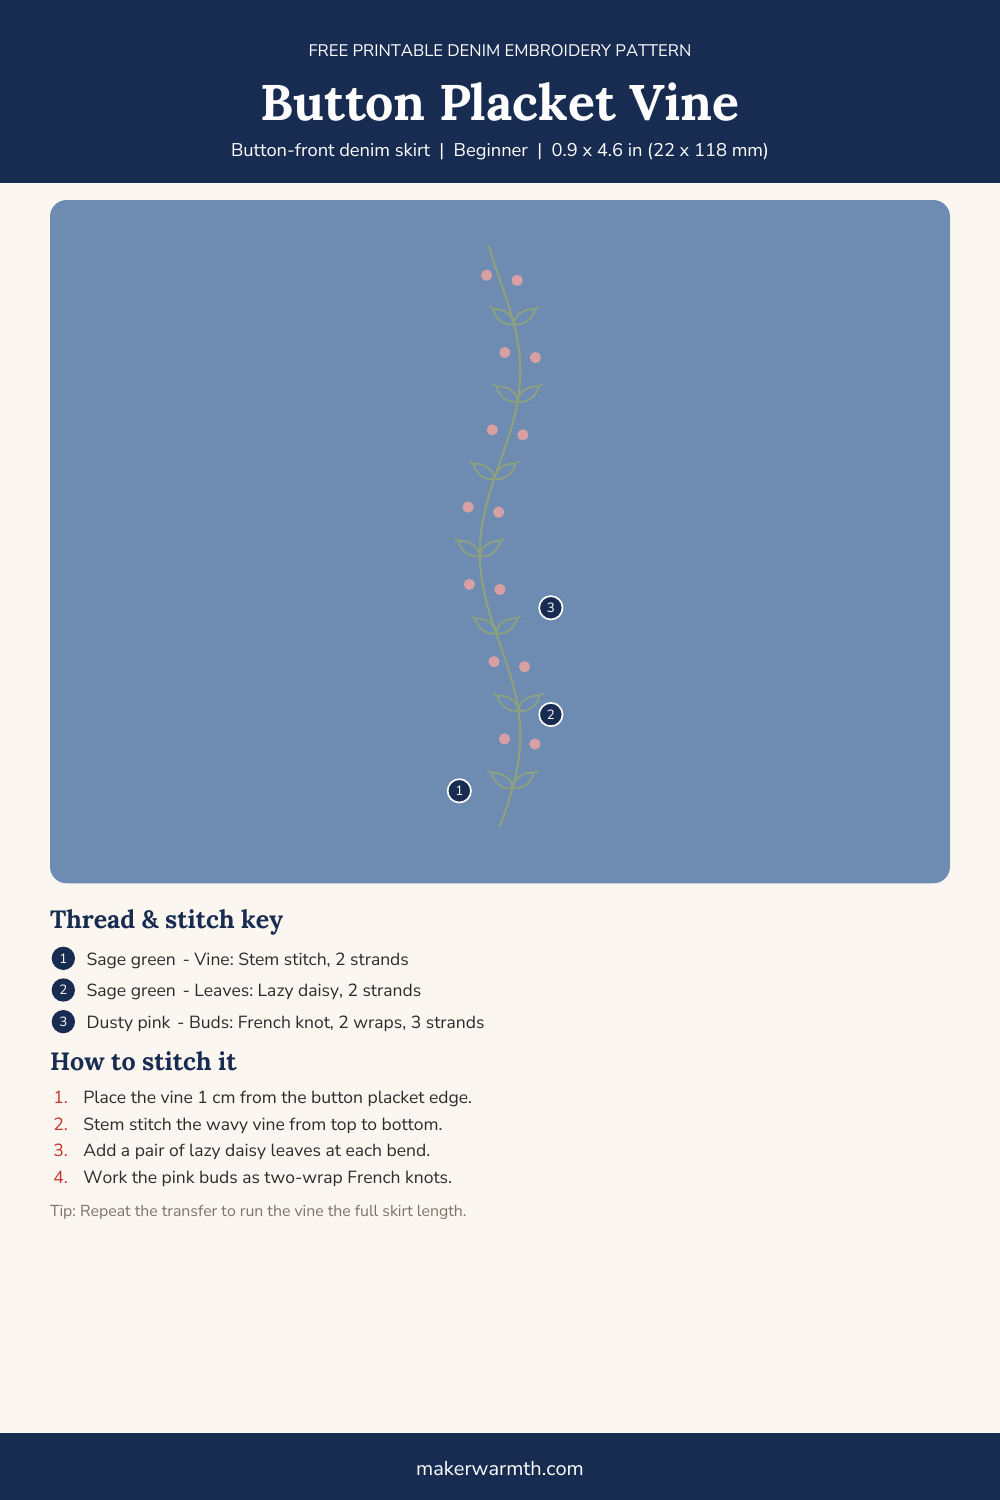
A slim vine that follows the buttons of a button-front skirt draws the eye down and makes the skirt look longer. It’s all simple stitches, and you can stop at any point: a short vine at the top looks just as finished as a full-length one.
Placement: about 1 cm from the button placket edge
Stitches: stem stitch, lazy daisy, French knot
Floss: sage green, dusty pink
Level: Beginner
Time: about 2 hours per repeat
Size: 0.9 x 4.6 in per repeat
How to stitch it
- Stem stitch the wavy vine from top to bottom.
- Add a pair of lazy daisy leaves at each bend.
- Work the pink buds as two-wrap French knots.
- Repeat the transfer to continue the vine down the skirt.
6. Strawberries on a Mini Skirt Pocket

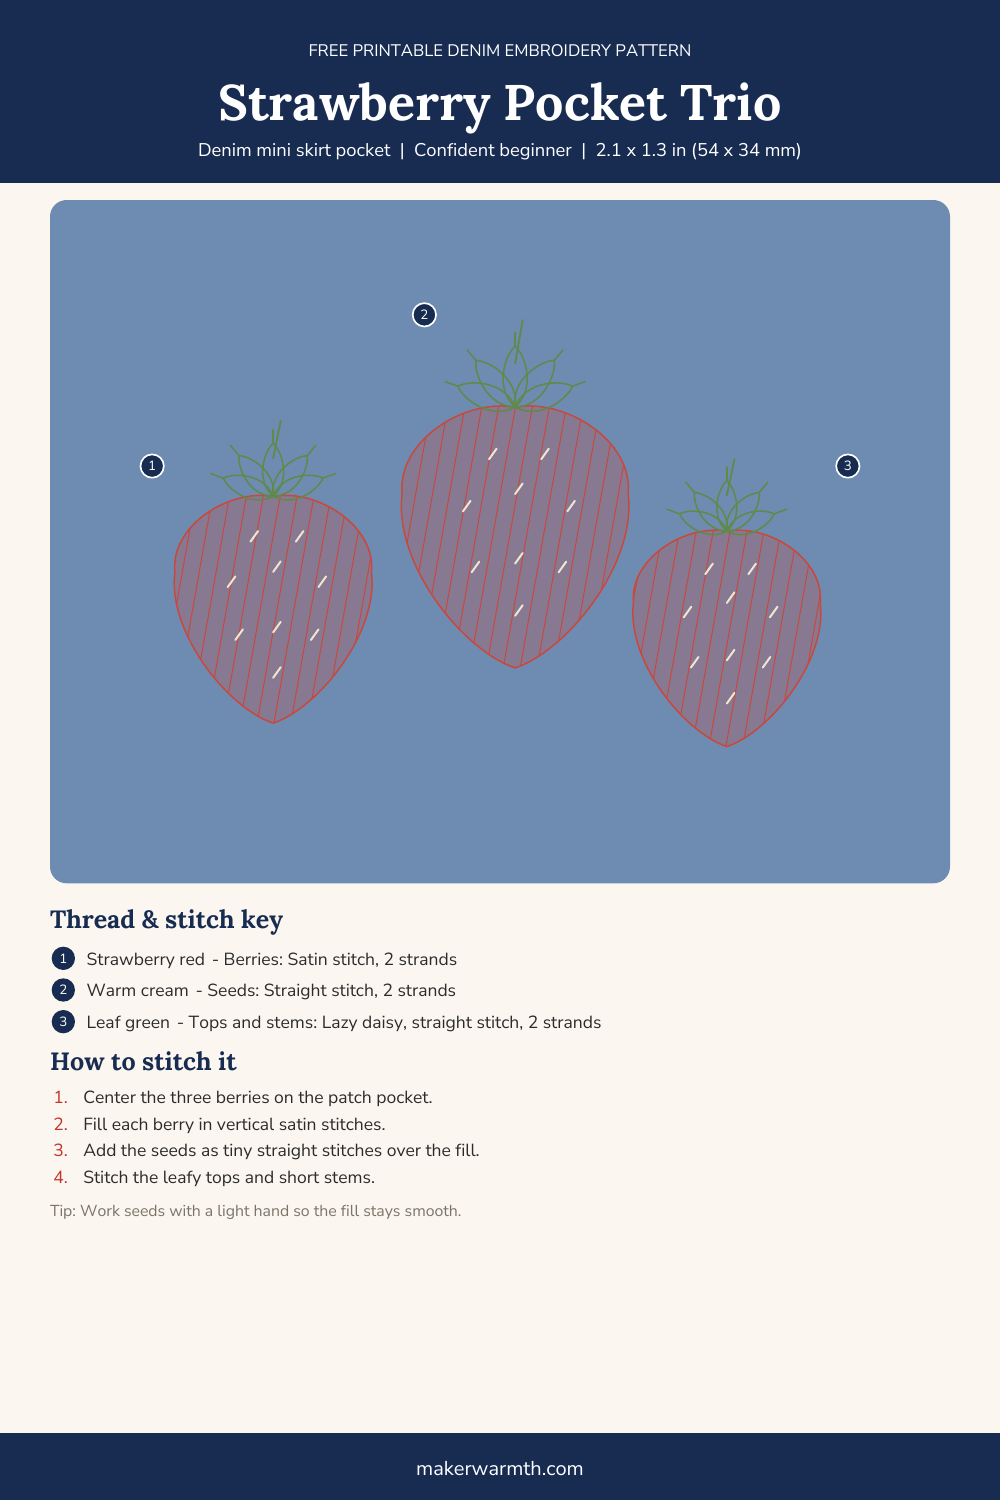
Three red strawberries on a patch pocket are playful without being childish. The tiny cream seeds go on top of the satin fill at the end, so work them with a light hand to keep the berries smooth.
Placement: centered on the front patch pocket
Stitches: satin stitch, straight stitch, lazy daisy
Floss: strawberry red, warm cream, leaf green
Level: Confident beginner
Time: 2 to 3 hours
Size: 2.1 x 1.3 in
How to stitch it
- Fill each berry with vertical satin stitches.
- Add the seeds as tiny straight stitches over the fill.
- Stitch the leafy tops in lazy daisy and the short stems in straight stitch.
Denim Shorts Embroidery
Shorts are the quickest denim project in this list. The cuff is a ready-made border, and cutoffs are the perfect place to try visible mending.
7. Gold Stars on a Cuffed Hem
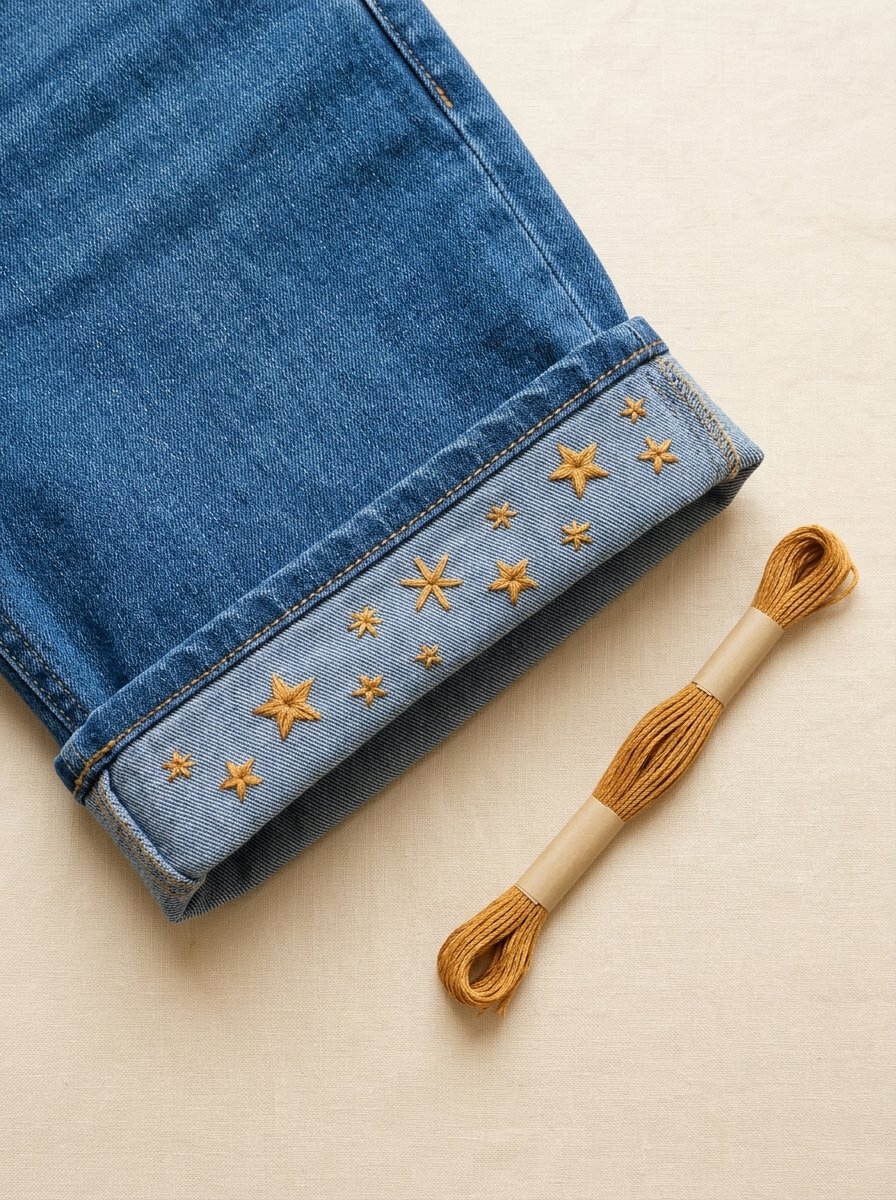
Scattered ochre stars on a turned-up cuff take only straight stitches, which makes this the easiest idea in the whole collection. Unroll the cuff before you mark it, and stitch on the side that shows when it’s folded back up.
Placement: the outer side of each turned-up cuff
Stitches: straight stitch
Floss: ochre gold
Level: Beginner
Time: about 1 hour per cuff
Size: 4.3 x 0.8 in per repeat

How to stitch it
- Bring the needle up at the center of a star.
- Make each ray as one straight stitch, coming back up at the center every time.
- Repeat the strip around the full cuff.
8. Sashiko Mending Patch on Cutoffs
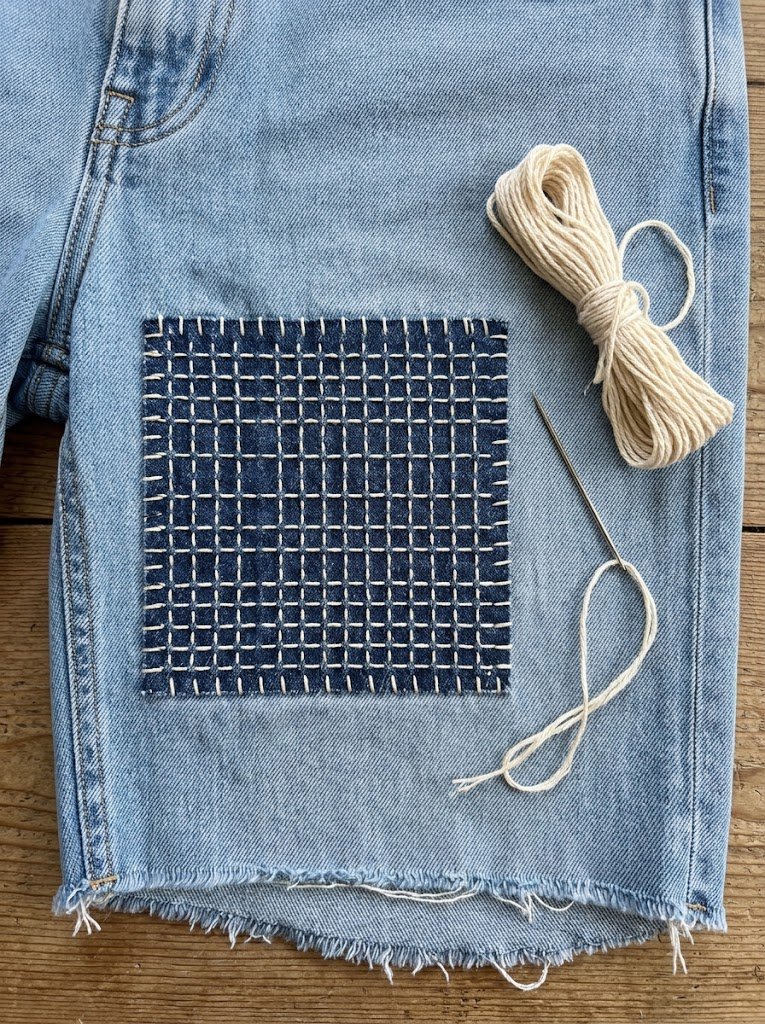
Sashiko is a Japanese running-stitch technique that strengthens worn fabric and turns the repair into a feature. A darker denim patch goes behind the thin spot, and an even grid of cream stitches holds it in place. It works just as well on a spot that hasn’t worn through yet.
Placement: over a worn or thin area on the leg
Stitches: running stitch
Floss: indigo floss, cream sashiko thread (or 6 strands of cream floss)
Level: Confident beginner
Time: 2 to 3 hours
Size: 2.4 x 2.4 in
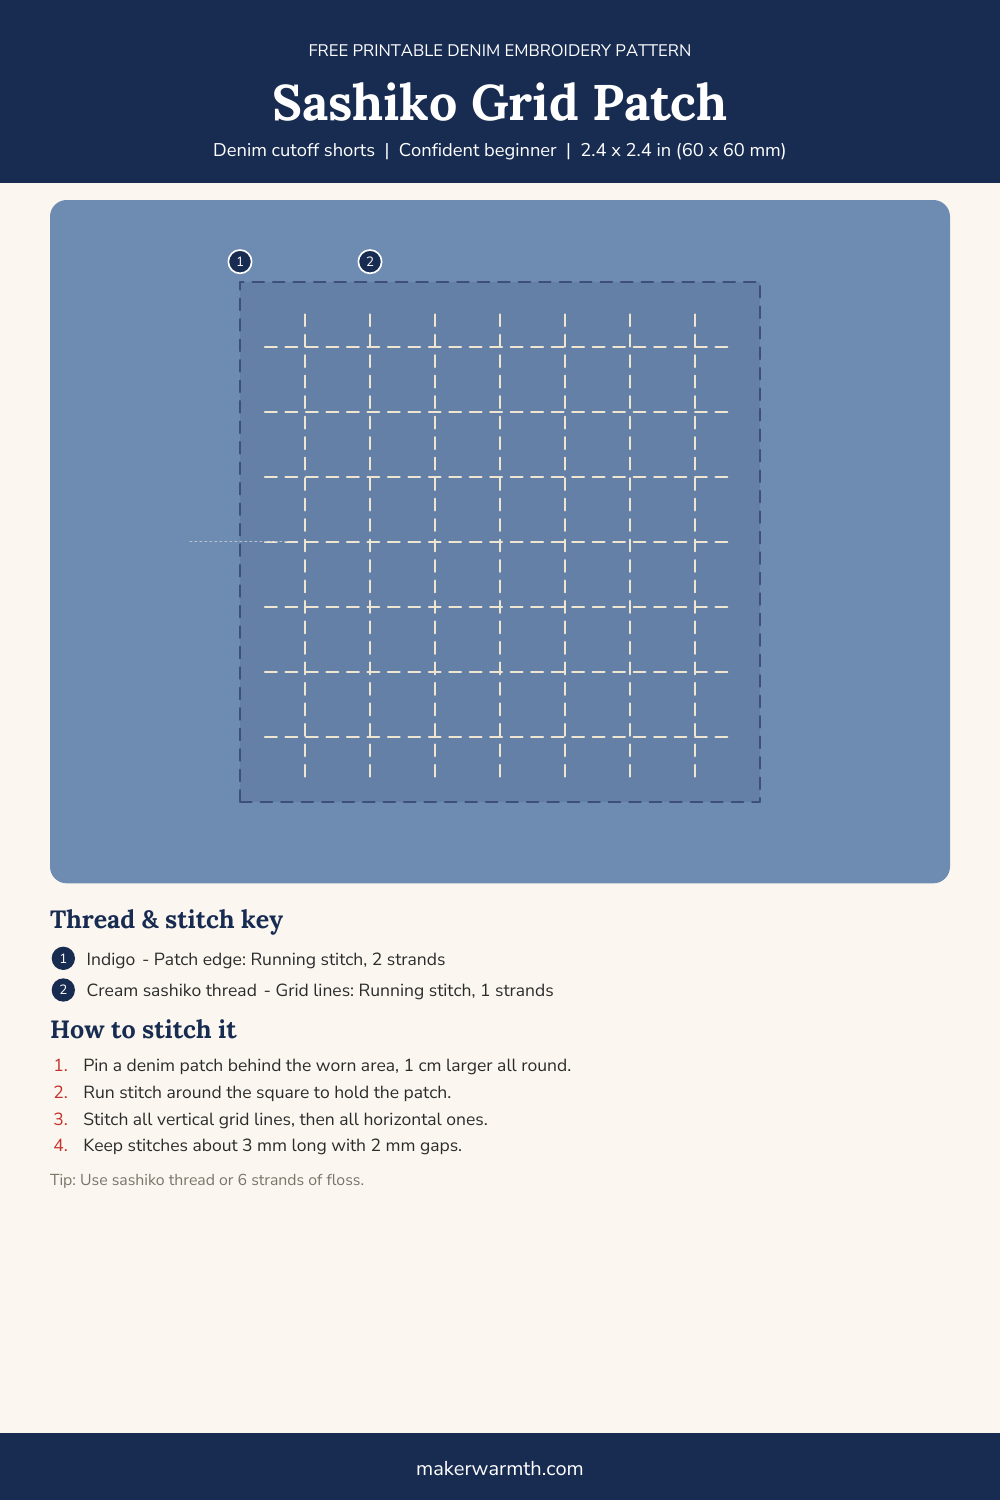
How to stitch it
- Pin a denim patch behind the worn area, 1 cm larger all round.
- Running stitch around the square to hold the patch.
- Stitch all vertical grid lines, then all horizontal ones.
- Keep stitches about 3 mm long with 2 mm gaps.
Denim Overalls Embroidery
Overalls have two spots made for embroidery: the bib pocket, which sits right at eye level, and the straps, which are narrow enough to stitch without moving the hoop much.
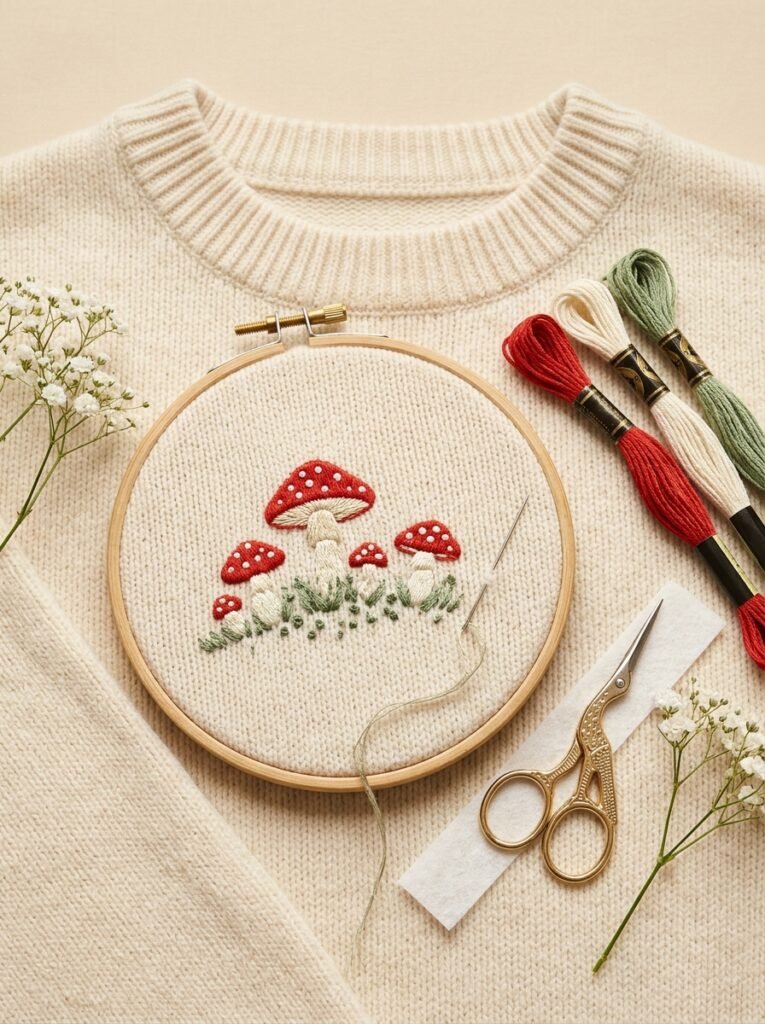
9. Mushroom Cluster on the Bib Pocket

Three little mushrooms with spotted caps fit the cozy, cottagecore look of overalls perfectly. Fill the stems before the caps so the cap edge covers where they meet, and leave the grass for the very end.
Placement: lower half of the bib pocket
Stitches: satin stitch, French knot, straight stitch
Floss: rust red, warm cream, sage green
Level: Confident beginner
Time: 2 to 3 hours
Size: 2.0 x 1.3 in
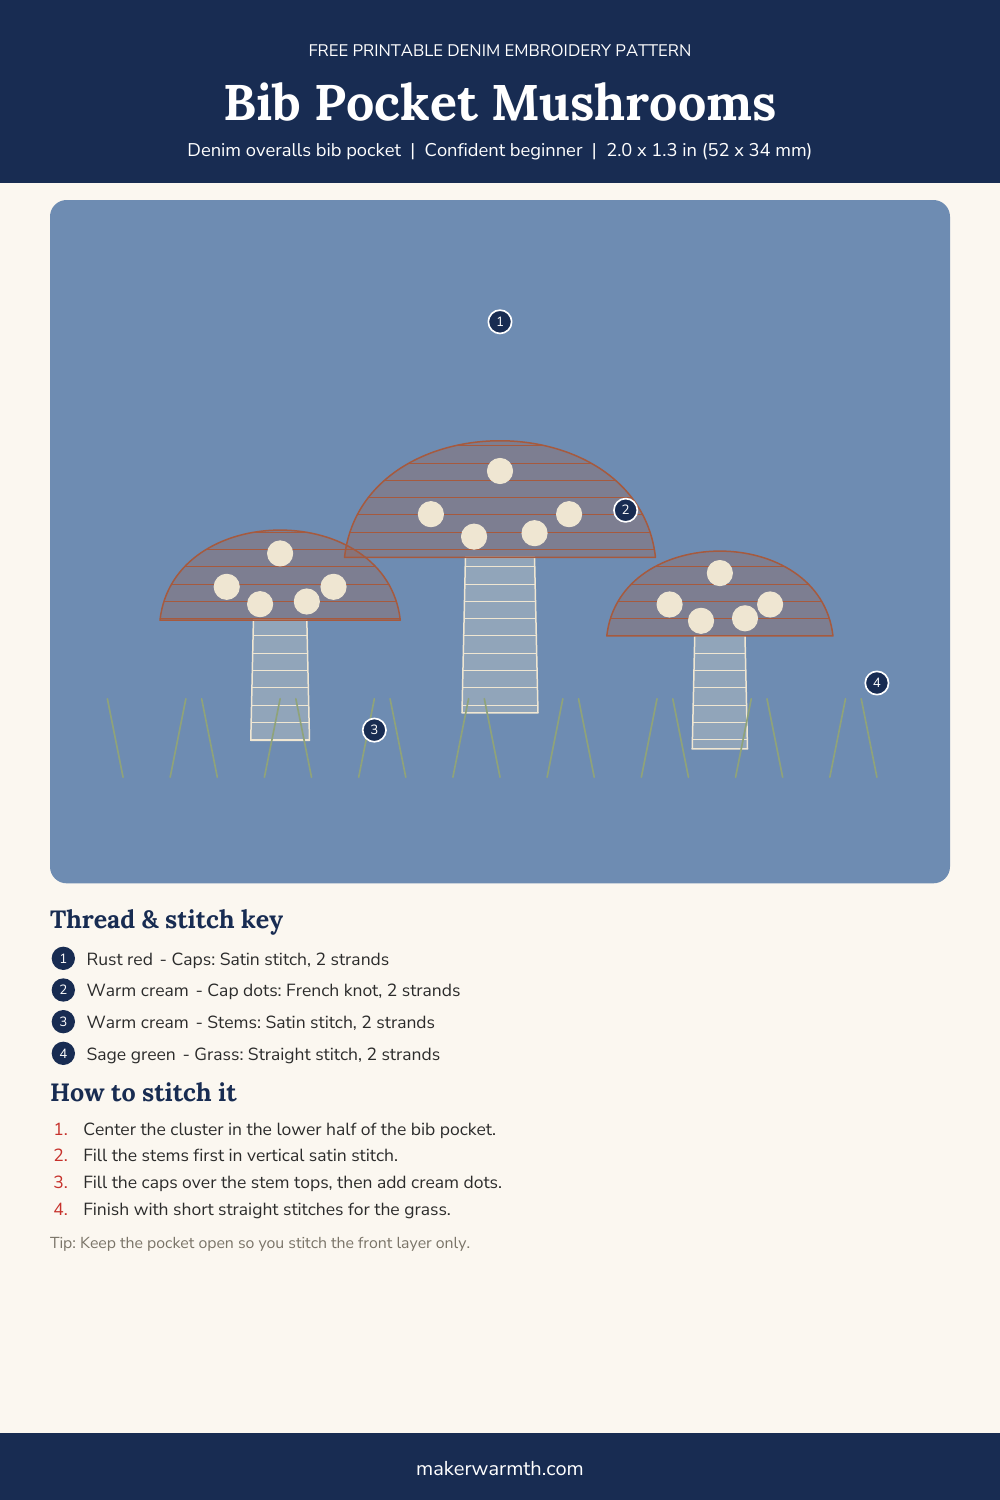
How to stitch it
- Fill the stems in vertical satin stitch.
- Fill the caps over the stem tops, then add the cream French knot dots.
- Finish with short straight stitches for the grass.
10. Rainbow Bars on Overall Straps
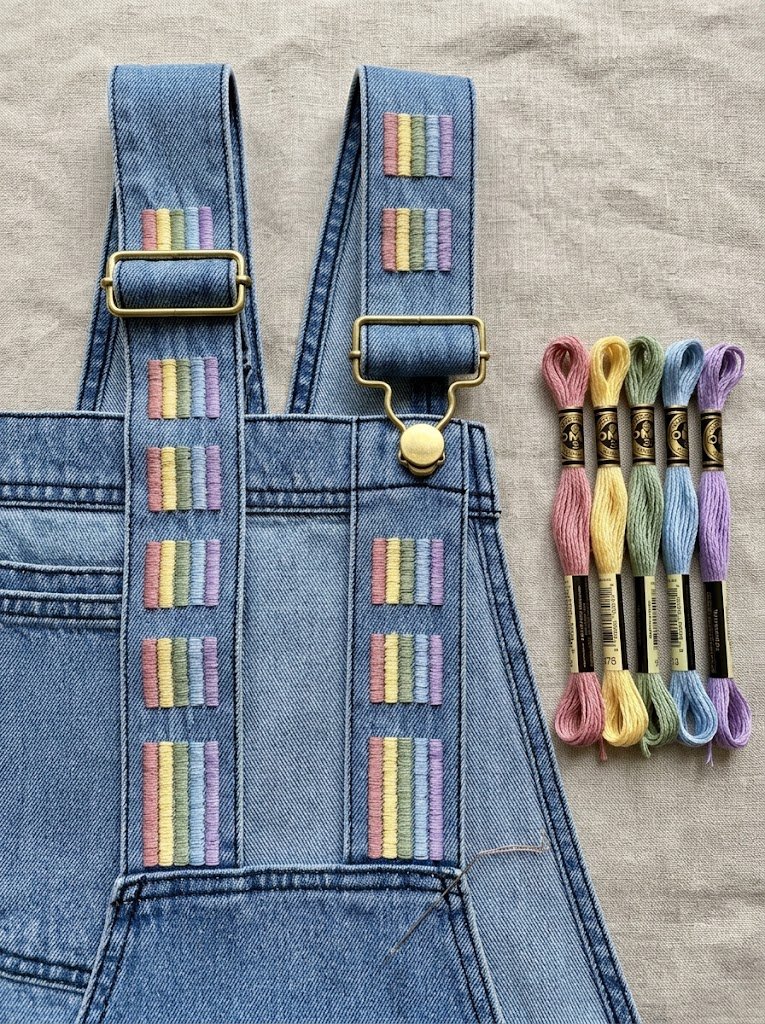
Short blocks of soft color down the straps are a great way to use up leftover floss. Each bar is a small rectangle of satin stitch, so it’s easy to keep neat, and you can stitch as many or as few as you like.
Placement: down the center of both straps
Stitches: satin stitch
Floss: dusty pink, soft yellow, sage green, soft blue, lavender
Level: Beginner
Time: 2 to 3 hours for both straps
Size: 1.3 x 4.9 in per repeat
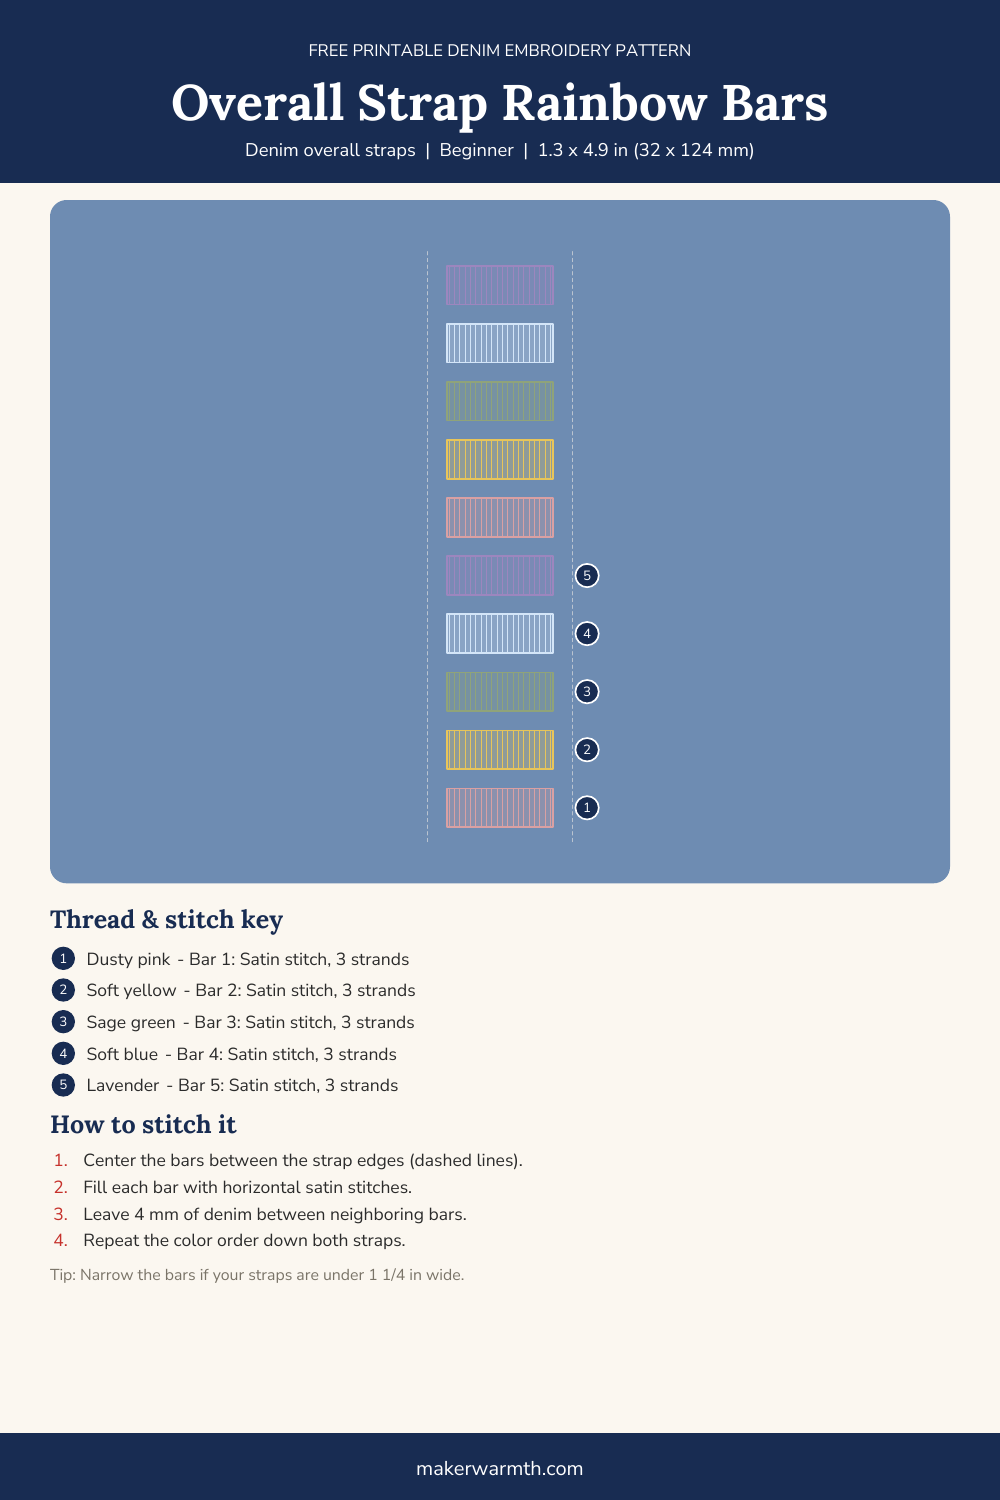
How to stitch it
- Center the bars between the strap edges.
- Fill each bar with horizontal satin stitches.
- Leave about 4 mm of denim between neighboring bars.
- Repeat the color order down both straps.
Denim Dress Embroidery
On a denim dress, embroidery works best near the face or at a pocket, where it frames the outfit instead of getting lost in the fabric.
11. Lavender Sprigs Around the Neckline
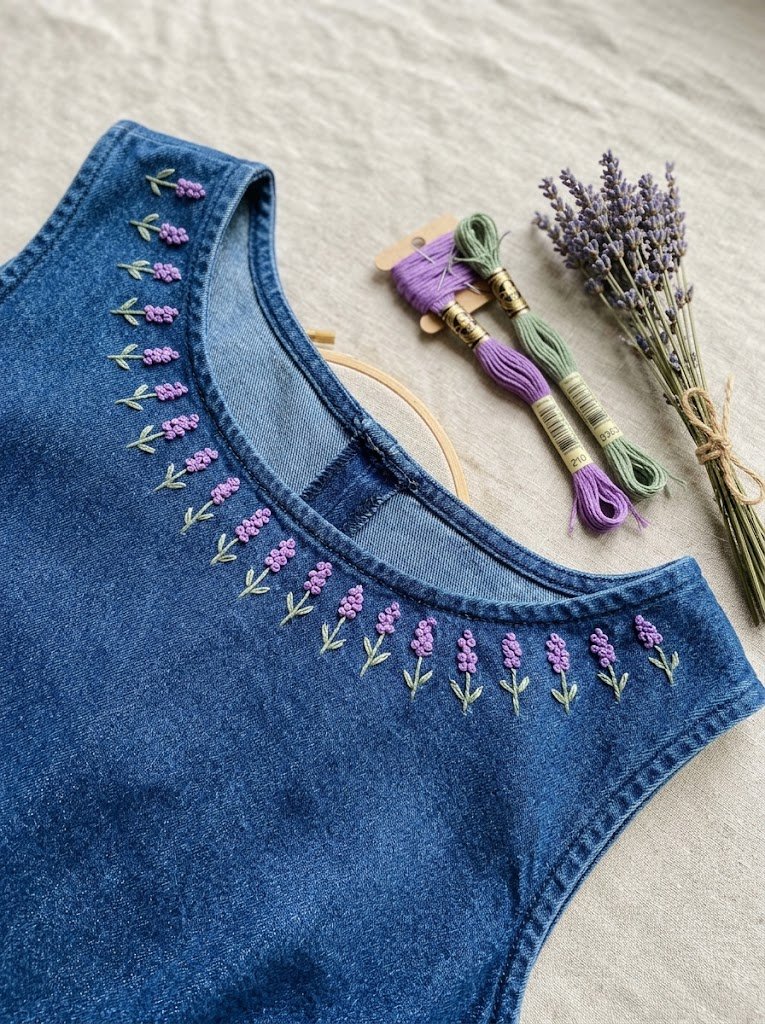
A ring of lavender sprigs around the neckline looks delicate and takes only two stitches. The pattern follows a curve; match its dashed line to the neckline seam and repeat it until the sprigs meet at the back.
Placement: about 1.5 cm below the neckline seam
Stitches: straight stitch, French knot
Floss: sage green, lavender
Level: Beginner
Time: 2 to 3 hours
Size: 4.7 x 1.7 in per repeat
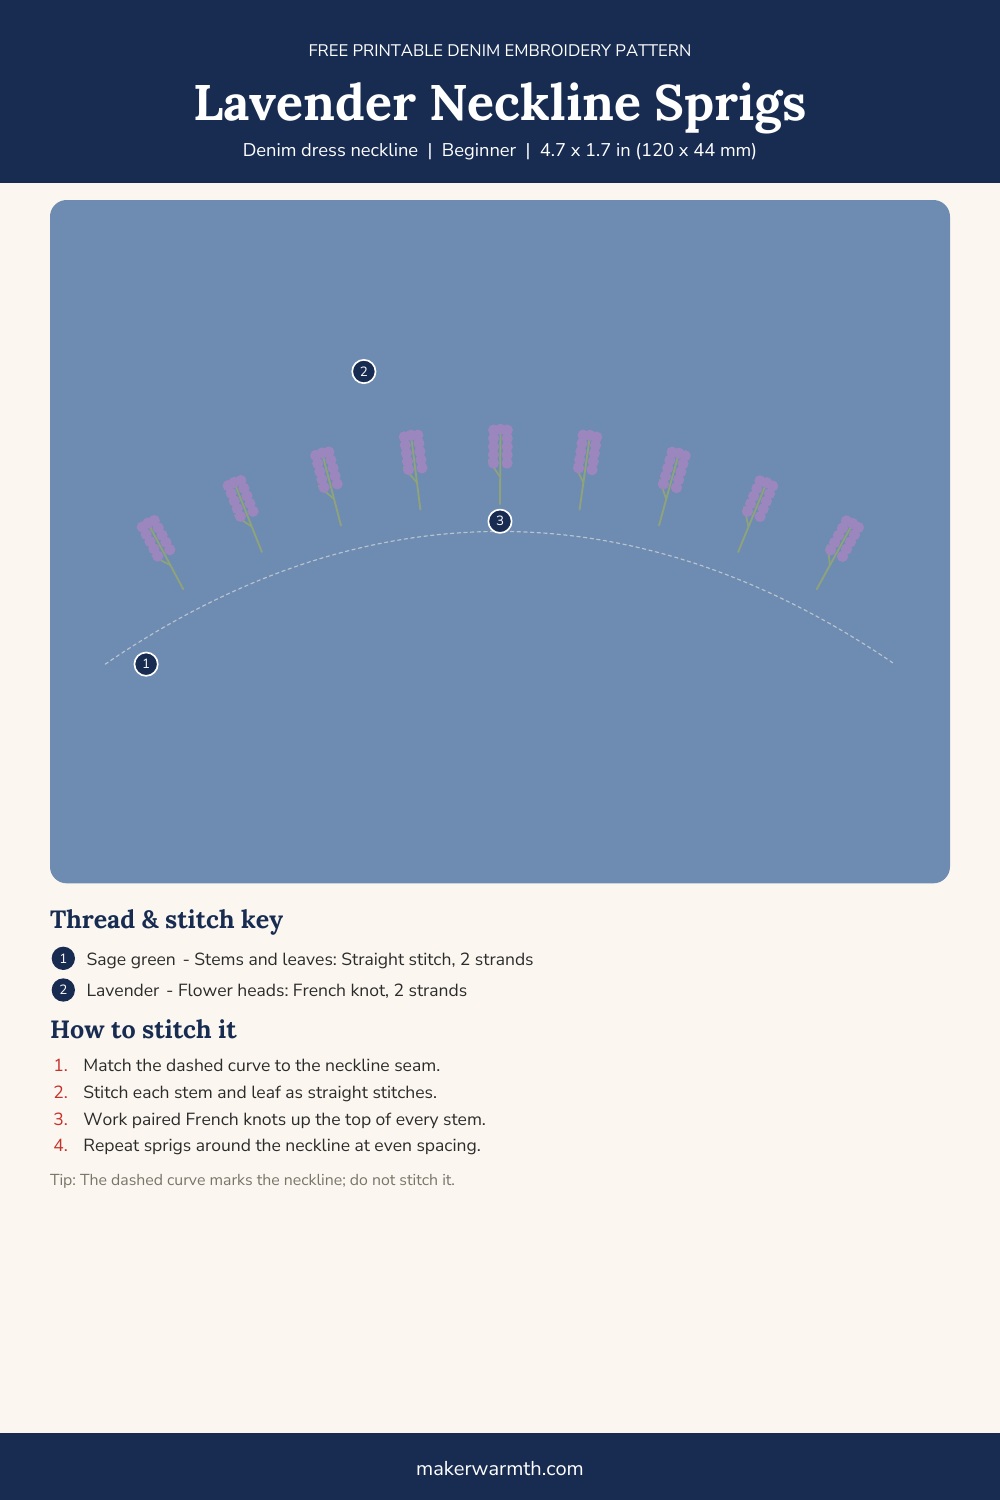
How to stitch it
- Stitch each stem and small leaf as straight stitches.
- Work paired lavender French knots up the top of every stem.
- Repeat the sprigs around the neckline at even spacing.
12. Moon and Stars on a Black Denim Pinafore
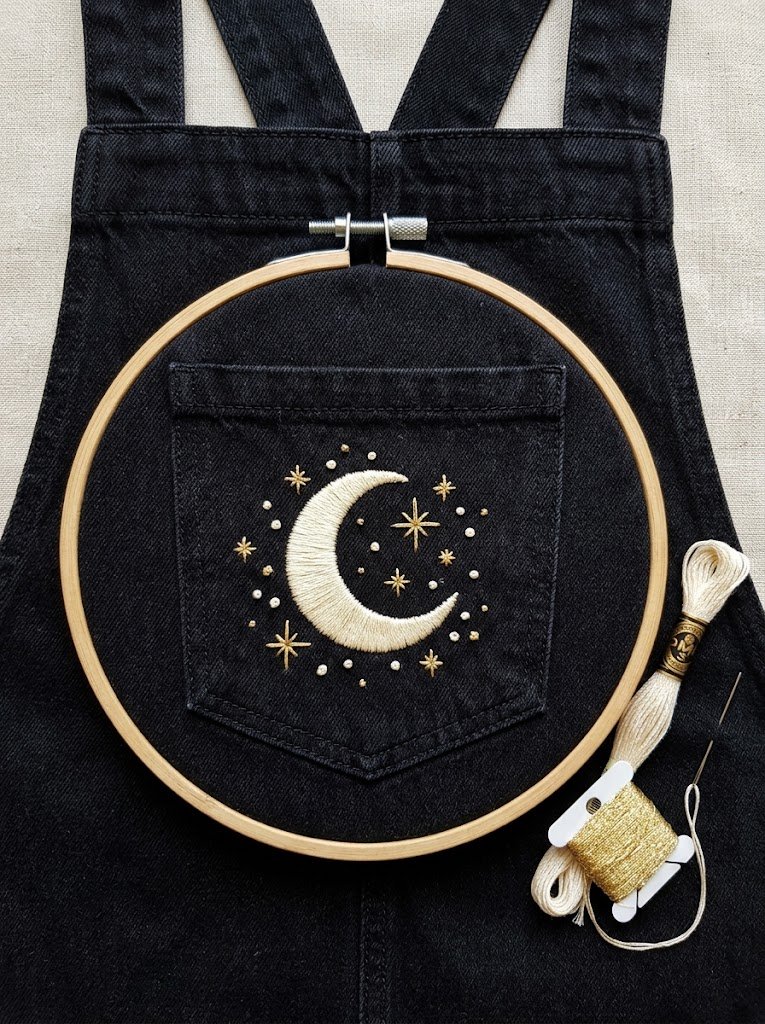
Black denim embroidery has the strongest contrast of all: cream and gold thread almost glow against it. A crescent moon with a few stars on a pinafore pocket is simple to stitch and looks striking from across the room.
Placement: the front pocket of the pinafore
Stitches: satin stitch, straight stitch, French knot
Floss: warm cream, ochre gold
Level: Confident beginner
Time: 2 to 3 hours
Size: 2.2 x 2.0 in
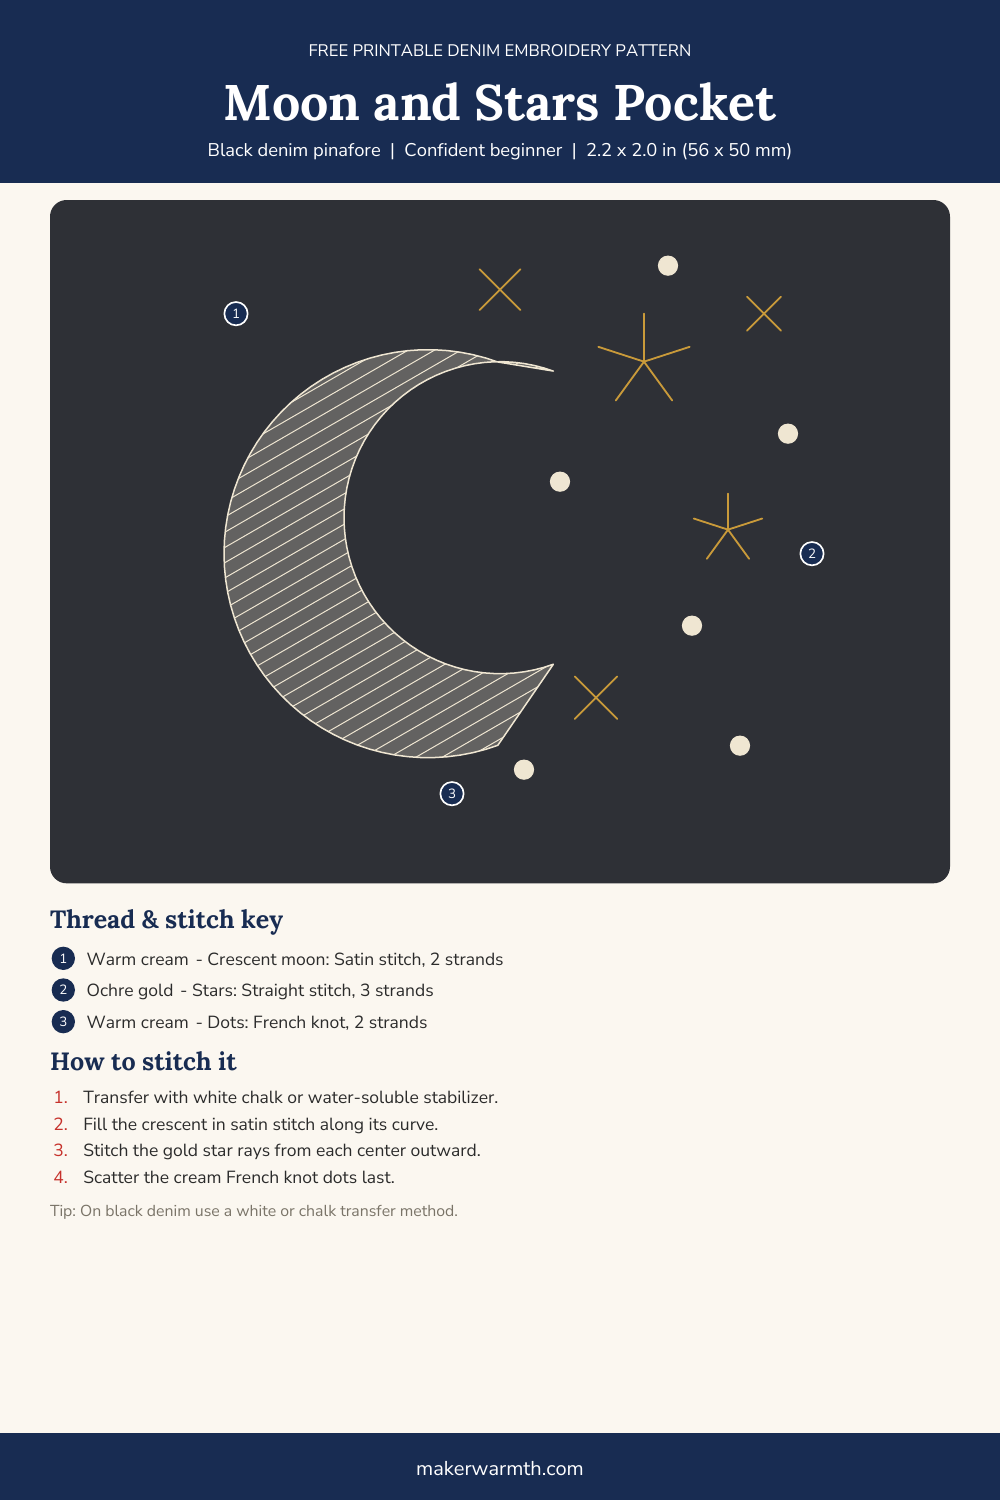
How to stitch it
- Transfer with white chalk or stick-and-stitch stabilizer; a dark pen won’t show.
- Fill the crescent in satin stitch following its curve.
- Stitch the gold star rays from each center outward.
- Scatter the cream French knot dots last.
The Stitches Behind These Designs
Stem stitch. Make a short stitch along the line, then bring the needle up halfway back along it, always on the same side. It gives a smooth, slightly twisted line for stems and vines.
Lazy daisy. Come up at the base of the petal, go back down in the same hole to form a loop, come up at the petal tip inside the loop and anchor it with a tiny stitch.
French knot. Come up where the knot goes, wrap the thread once or twice around the needle, and go down right next to the starting hole while holding the wraps snug.
Satin stitch. Lay straight stitches side by side from one edge of the shape to the other. On denim, keep each stitch shorter than about 1 cm so it won’t snag.
Backstitch. Come up one stitch length ahead, go back down at the end of the previous stitch, and repeat for a solid line.
Straight stitch and running stitch. A straight stitch is a single stitch from point to point. A running stitch is a row of them with even gaps between, the base of sashiko.
Denim Embroidery FAQ
What needle is best for embroidery on denim?
A sharp embroidery or crewel needle, size 5 to 7, goes through denim cleanly. A larger eye also makes it easier to pull 3 strands of floss through the thick weave.
Do I need a hoop for denim embroidery?
For stitched fills like the lemons or strawberries, a hoop keeps the fabric flat and the stitches even. On thick areas like collars, cuffs and straps you can hold the fabric in your hand instead.
How do I transfer a pattern onto black denim?
Use white chalk, a white fabric pen or a stick-and-stitch stabilizer. Dark pens and tracing through the fabric don’t work on black or dark denim.
How do I wash embroidered denim?
Turn the garment inside out, wash it in cold water on a gentle cycle and let it air dry. Press it from the back over a towel so the stitches don’t get flattened.
Which denim piece are you stitching first: a shirt, a skirt or an old pair of overalls? Tell me in the comments.
More denim and clothing embroidery ideas:
Jeans Embroidery Ideas: 12 Free Printable Patterns
Simple Flower Embroidery Designs: 15 Easy Motifs with Free Printable Patterns
Bow Embroidery: 15 Sweet Ideas for Jeans, Sweaters and Shirts
Sunflower Embroidery on Clothes: 8 Ideas for Denim, Shirts and Sweatshirts